SSTuino II - Frequently Asked Questions (FAQ)
This article contains the most commonly asked questions and basic troubleshooting tips for your SSTuino II product.
Problems with Uploading Code
I get a warning that says avrdude: jtagmkII_initialize(): Cannot locate “flash” and “boot” memories in description
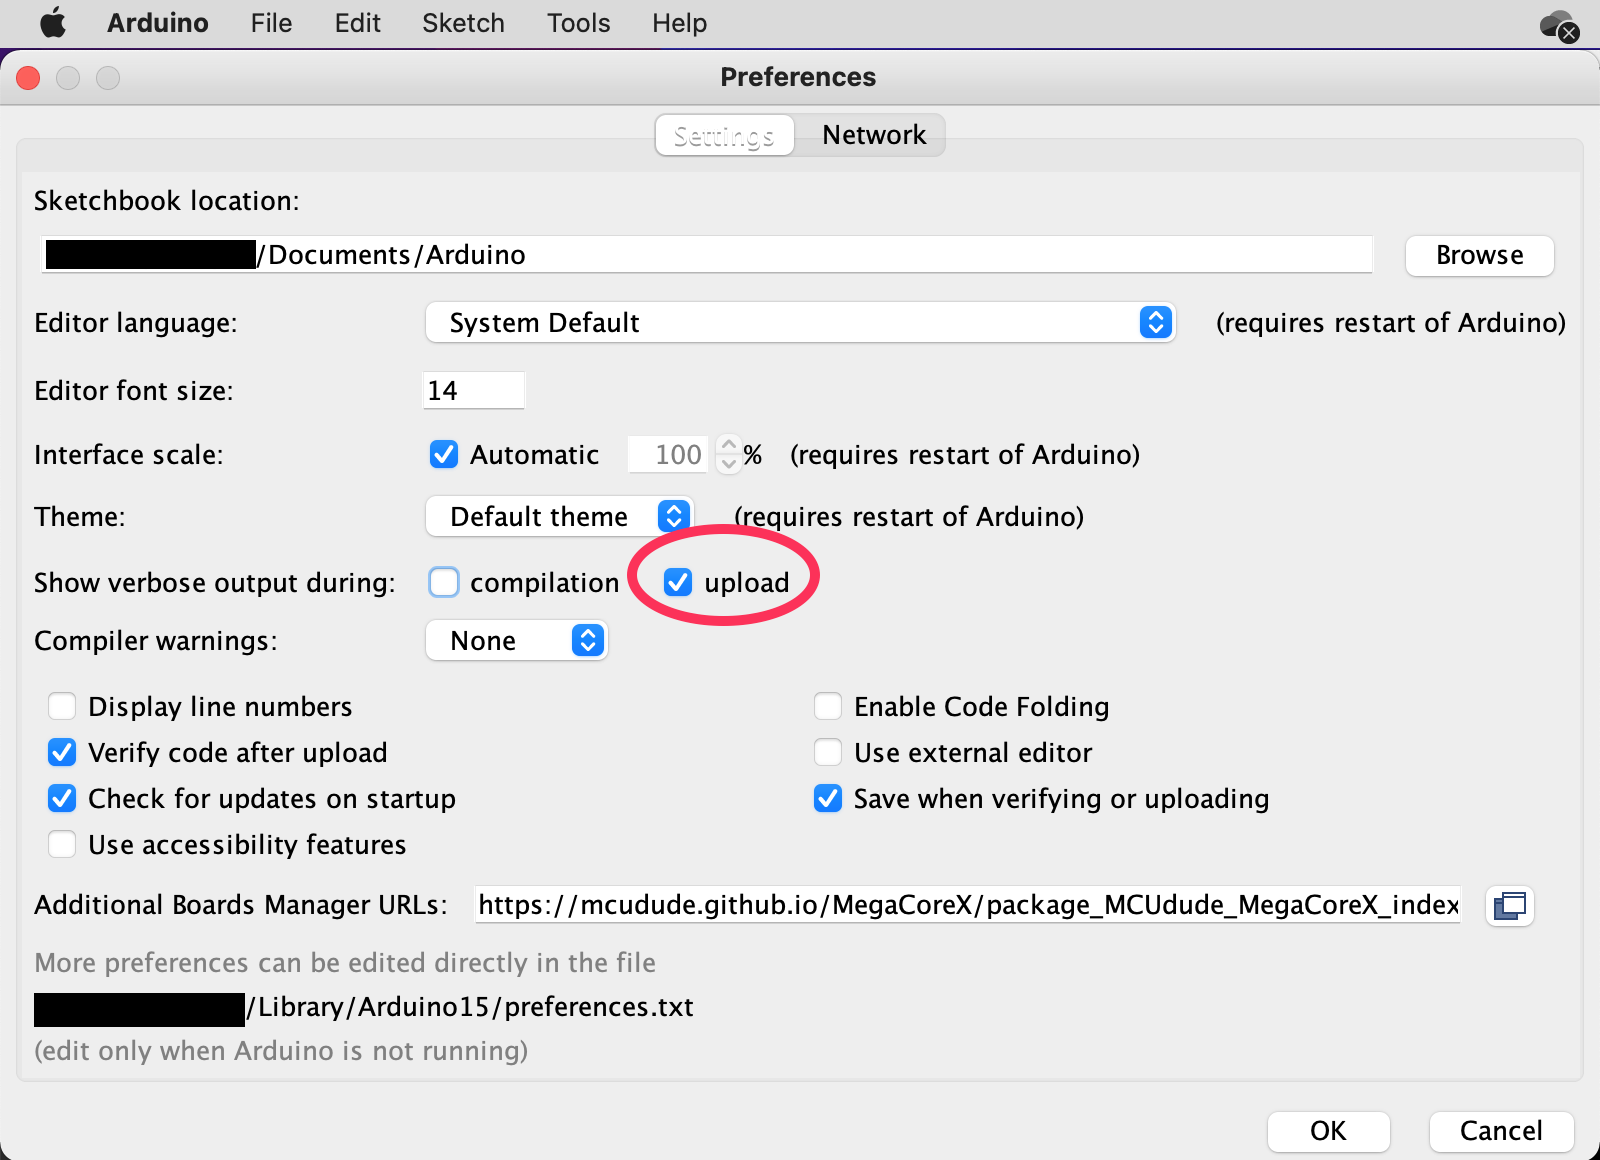
This warning message will not affect your code uploads, and you do not need to worry as long as Arduino IDE shows that your upload is completed. If you wish to see the code upload progress bar, you can turn on verbose mode for code upload:
Solution: As of 2022/08/31, you can update your SSTuino II board through the Board Manager to version 1.1.2, which permanently fixes this issue.
My code refuses to upload with the error avrdude: jtagmkII_close(): timeout/error communicating with programmer (status -1)
If your error looks like the one in this Arduino forum post, your SSTuino II might be faulty. If you still experience this issue even after unplugging everything from the board (except the USB cord, of course), and the board is within warranty, please contact us through the Help Centre and quote your board's serial number.
I have a compiler error of "bad CPU type"!
If your compiler error says Library/Arduino15/packages/arduino/tools/avr-gcc/7.3.0-atmel3.6.1-arduino7/bin/avr-g++: bad CPU type in executable, this means that you have not installed Rosetta 2 for your Mac.
Solution: Simply open Terminal, and enter the command softwareupdate --install-rosetta and follow the on-screen instructions to install Rosetta.
I cannot upload my code, and it has an error that says "RSP_ILLEGAL_MCU_STATE"
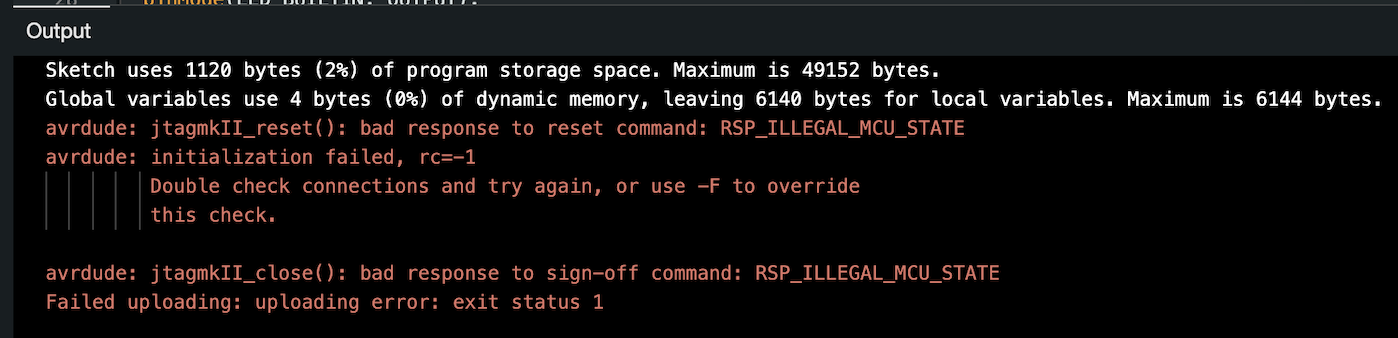
Solution: This error will require specialised hardware to resolve, usually an official programmer from Microchip. The following tutorial uses a lightly modified ATMega4809 Curiosity Nano.
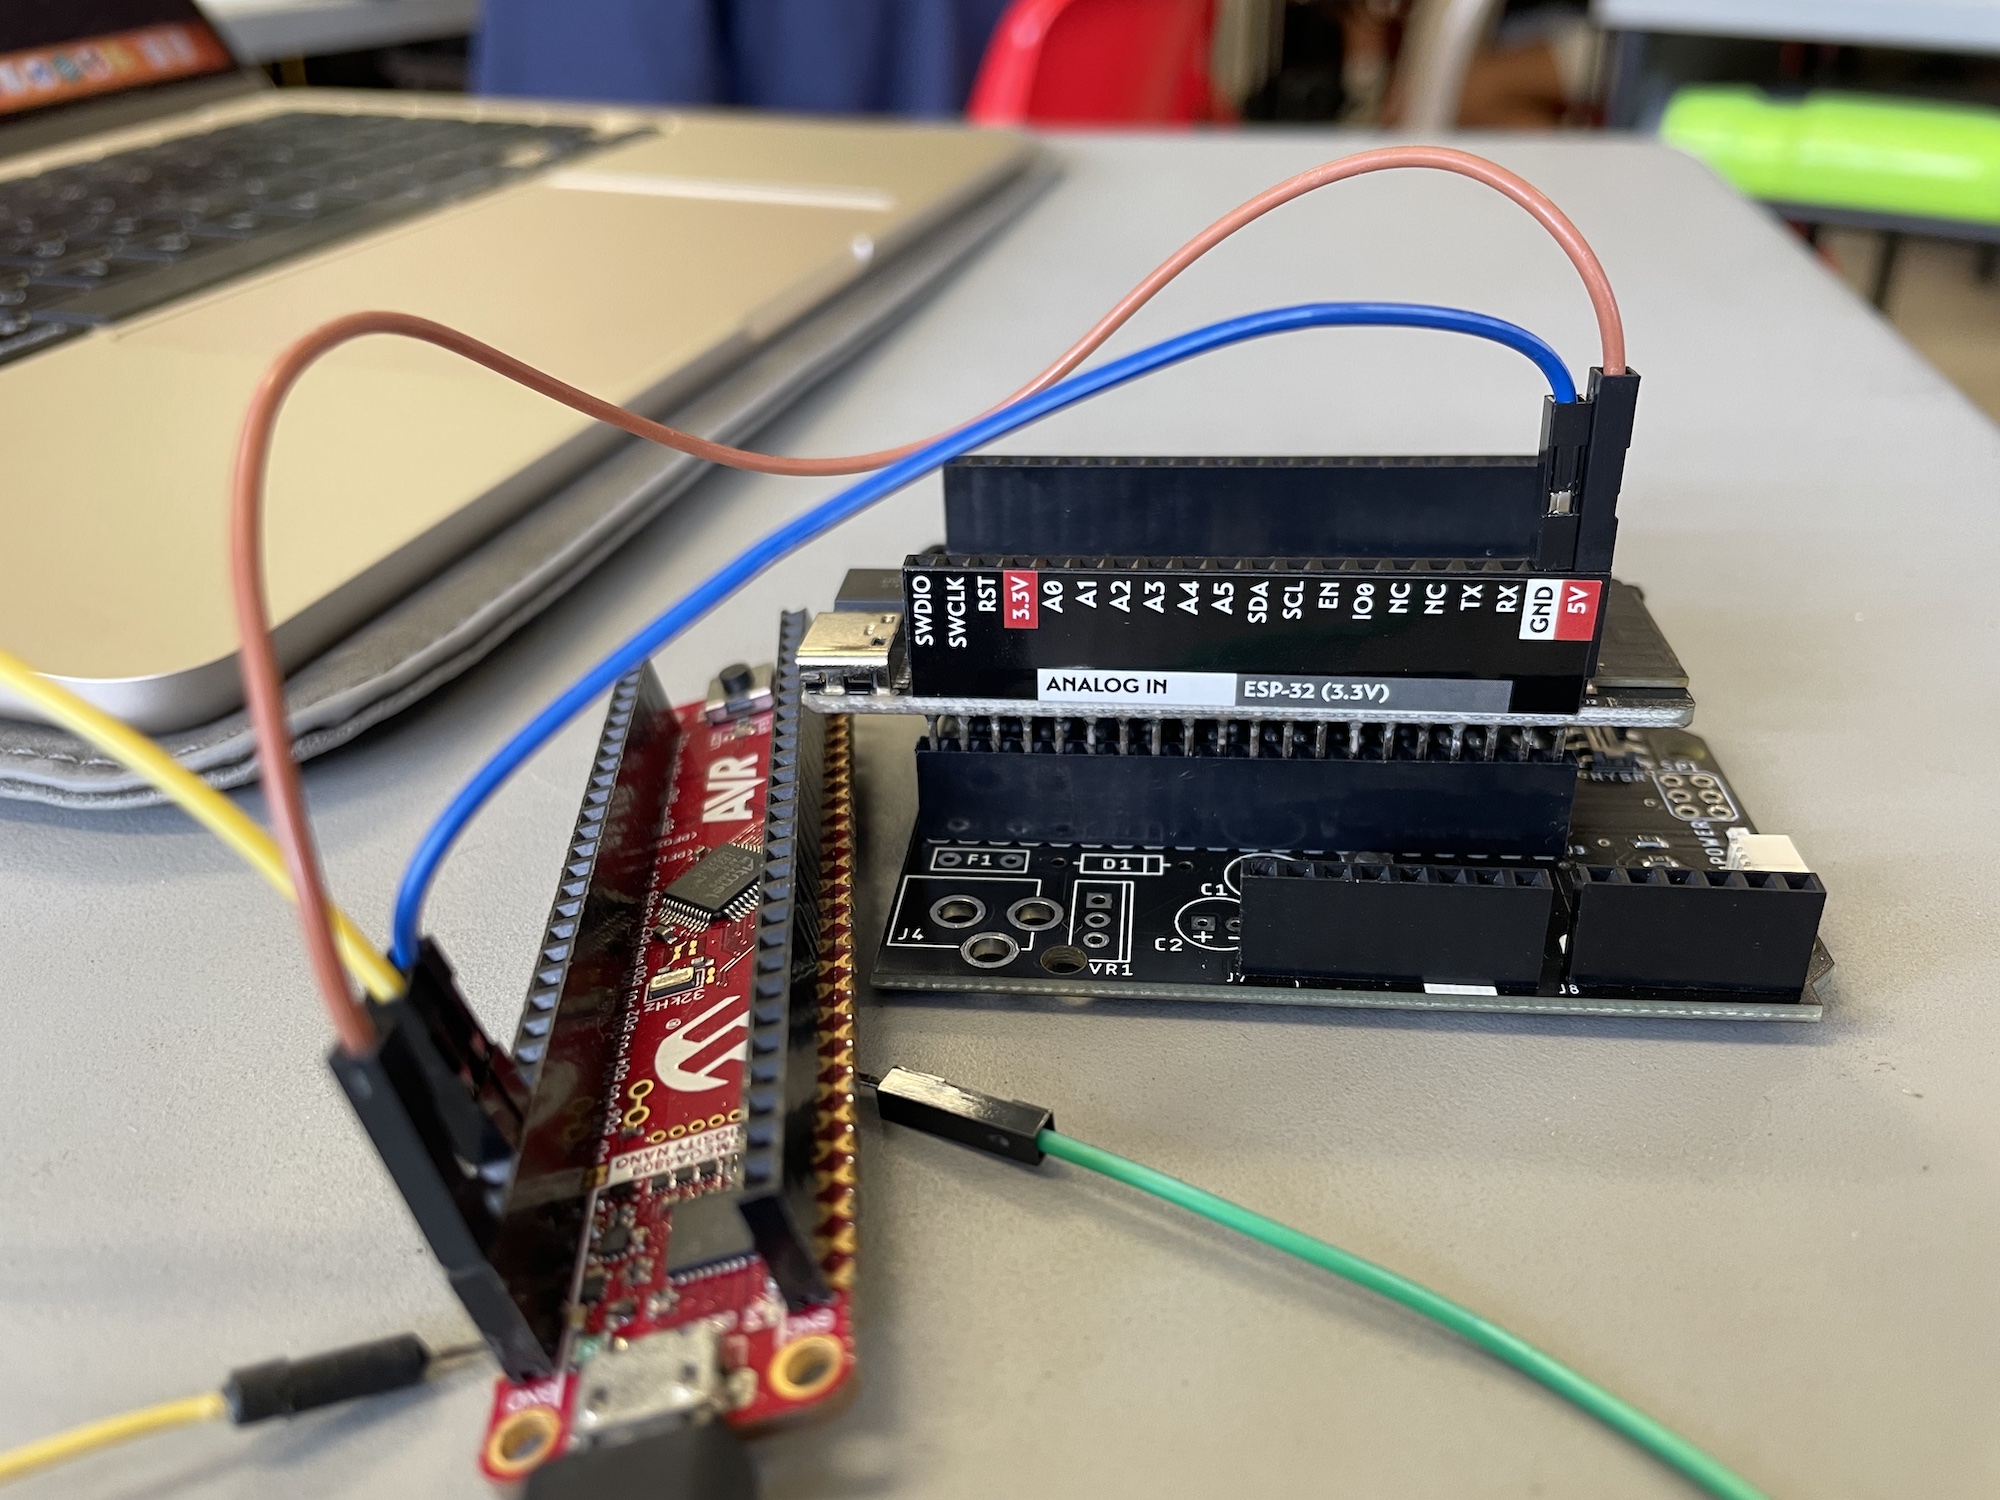
Firstly, connect the VBUS (5V) port of the Curiosity Nano to the SSTuino 5V pin
Secondly, connect the GND port of the Curiosity Nano to the SSTuino GND pin
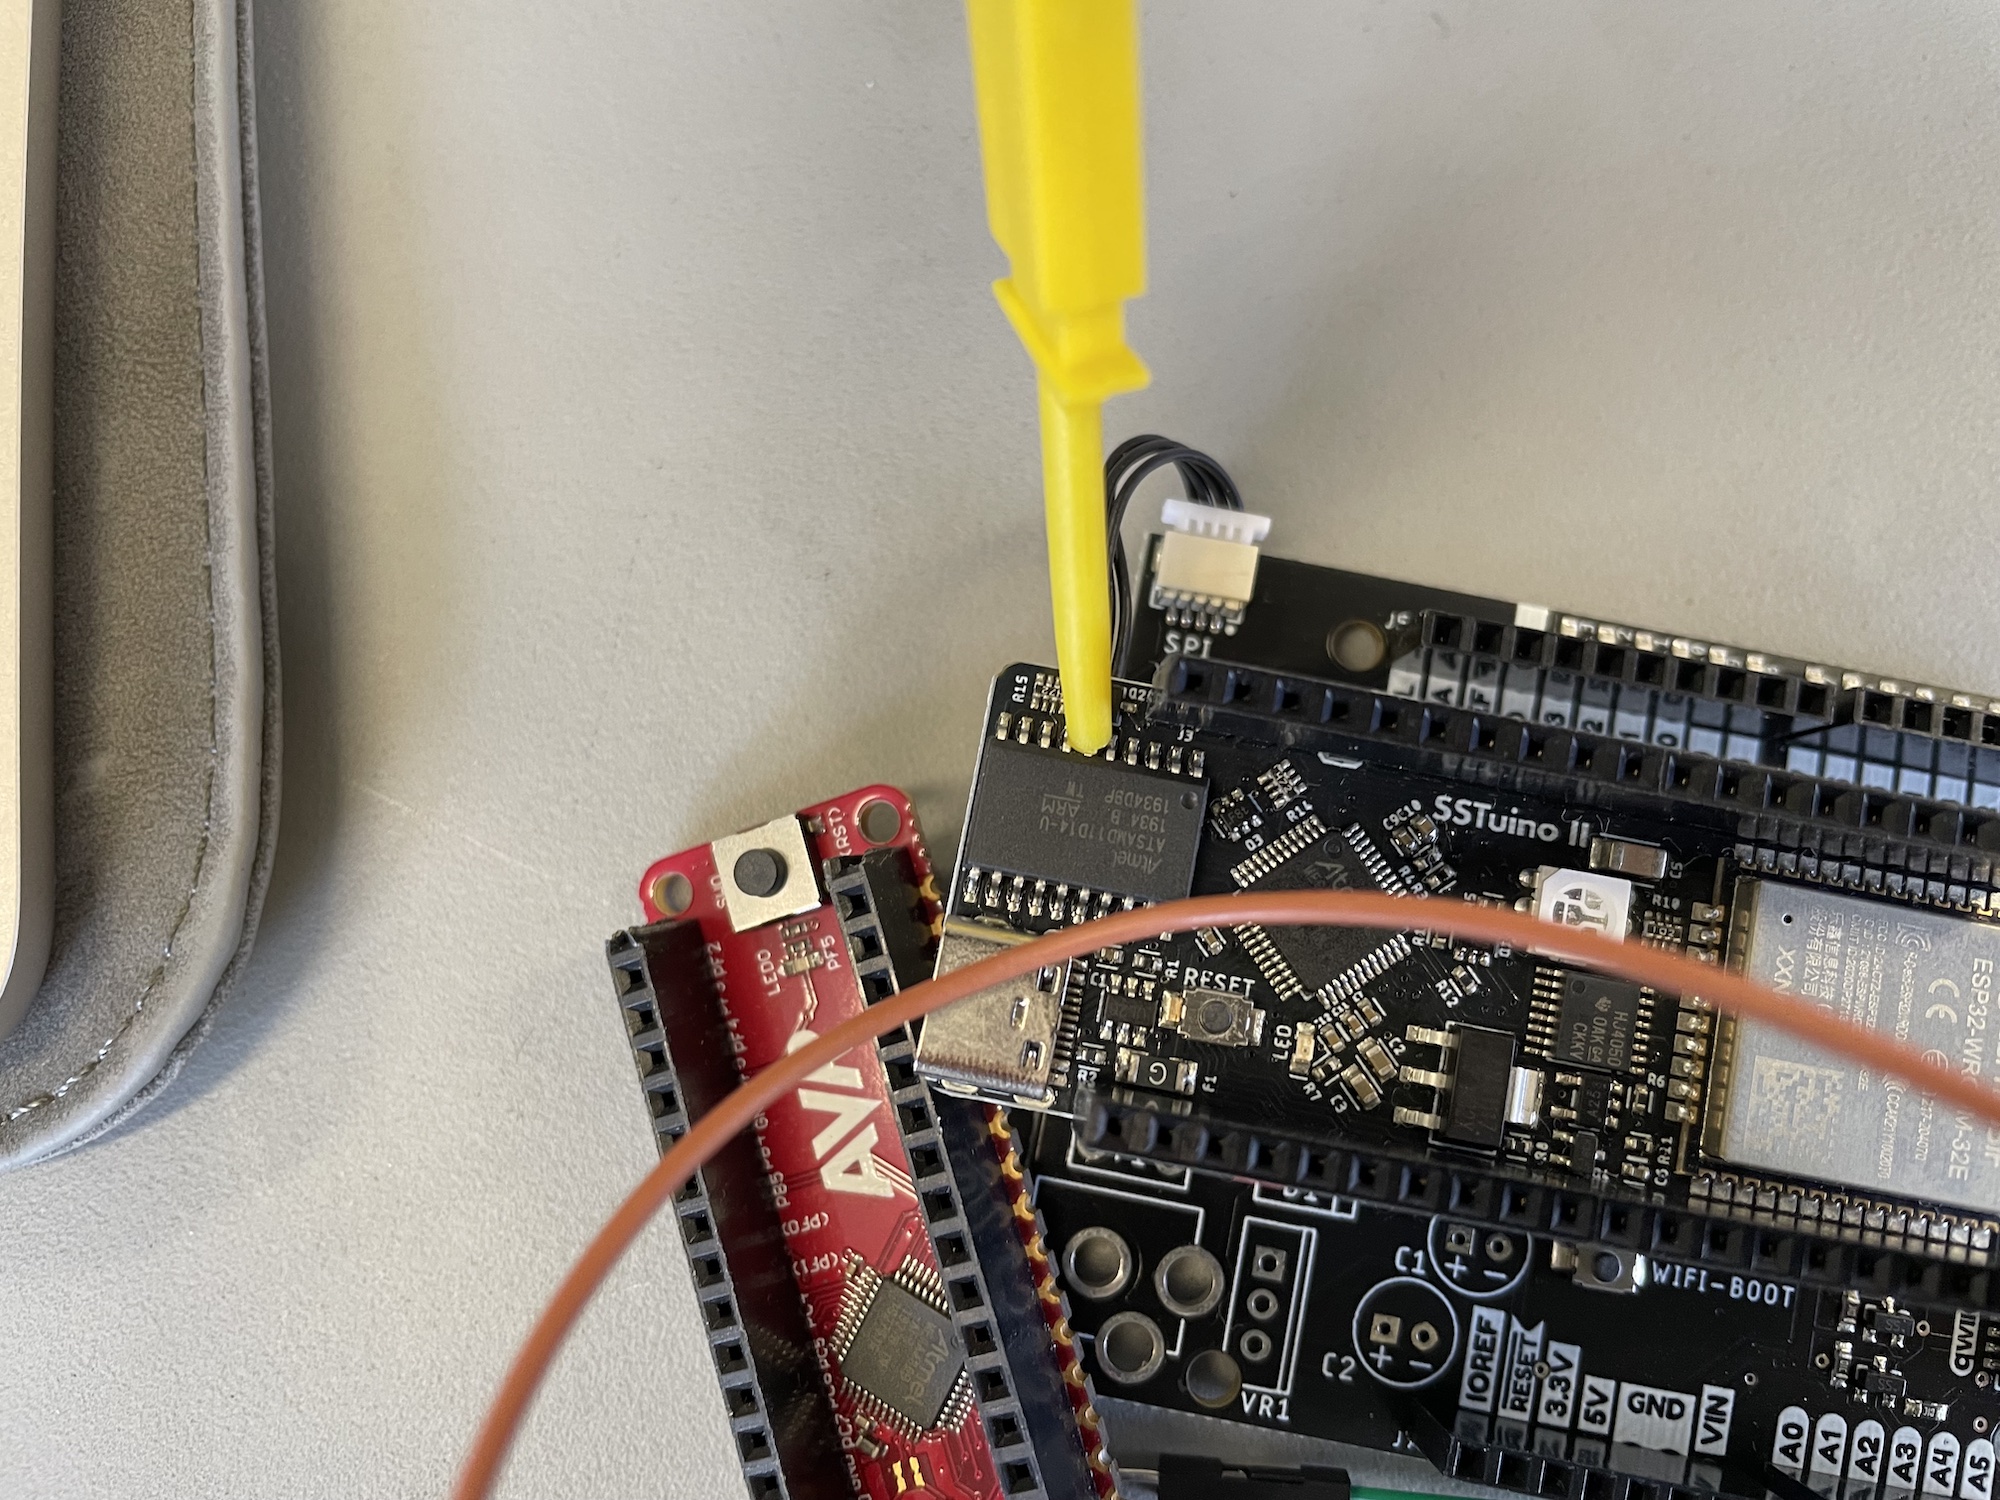
Third, connect the D0 port of the Curiosity Nano to the 6th pin (counting from the right, with the dot as the indicator for the 1st pin).
Run the following command:
~/Library/Arduino15/packages/SSTuino\ II\ Series\ Boards/tools/avrdude/7.0.0-arduino2/bin/avrdude -C ~/Library/Arduino15/packages/SSTuino\ II\ Series\ Boards/hardware/megaavr/1.1.2/avrdude.conf -v -patmega4809 -ccuriosity_updi -Pusb -e -FYou should see the text:
...
         Programmer Type : JTAGICE3_UPDI
         Description     : Curiosity in UPDI mode
         ICE HW version  : 0
         ICE FW version  : 1.21 (rel. 37)
         Serial number   : MCHP3094071800003537
         Vtarget         : 3.30 V
         PDI/UPDI clock Xmega/megaAVR : 100 kHz

avrdude: Partial Family_ID returned: "mega"
avrdude: AVR device initialized and ready to accept instructions

Reading |                                                    | 0% 0.00savrdude: Device is locked! Chip erase required to unlock.
avr_read(): error reading address 0x0000
    read operation failed for memory "signature"
avrdude: error reading signature data for part "ATmega4809", rc=-68
avrdude: System Information Block: "megaAVR P:0D:1-3"
avrdude: Received FamilyID: "megaAVR"
avrdude: erasing chip

Reading | ################################################## | 100% 0.01s

avrdude: Device signature = 0x1e9651 (probably m4809)

avrdude done.  Thank you.
Simply run the command again to ensure the chip is unlocked.
Issues with hardware
The debug lights (lights on the top row) flicker when I touch the bottom of the board!
This is a normal side effect of how microcontrollers and transistors behave, and will not cause issues to your hardware.
If you are interested to know the reasons behind the phenomenon, it is because every digital pin of the Explorer board is wired to a transistor called a MOSFET. These transistors are very sensitive to tiny variations in electrical pulses, and even a minor voltage difference such as the one caused by your fingers can cause it to connect the circuit and turn on the LED.
My SSTuino II restarts itself when I use a servo/LED strip/(insert high power peripheral here)
The SSTuino is equipped with a polyfuse (a special type of fuse that can reset itself) that limits the maximum current to 1A. In addition, if you connect your SSTuino to a computer, most computers will limit the maximum power consumption to 0.5A.
Solution: If you need to power high-power devices, you will need to supply an external 5V directly to the 5V line on the SSTuino.