Mobile Apps, Part II
In our previous tutorial, we have gone through all of the basics of making a Thunkable app. Now, we are going to actually create an app that links to Ubidots. Don't worry, we have made a whole bunch of functions that make it much easier to integrate.
Click on the button below to clone the template.
Clone the Thunkable IoT App Template
Trying out the basics
The template app is built similarly to the app you made in Part 1 of this tutorial, with a Home and Settings page. Let’s try out this app! Click the Play button (Web Preview).

We need to copy the credentials from Ubidots to our app. Click the Settings tab to go to the settings of the app first.
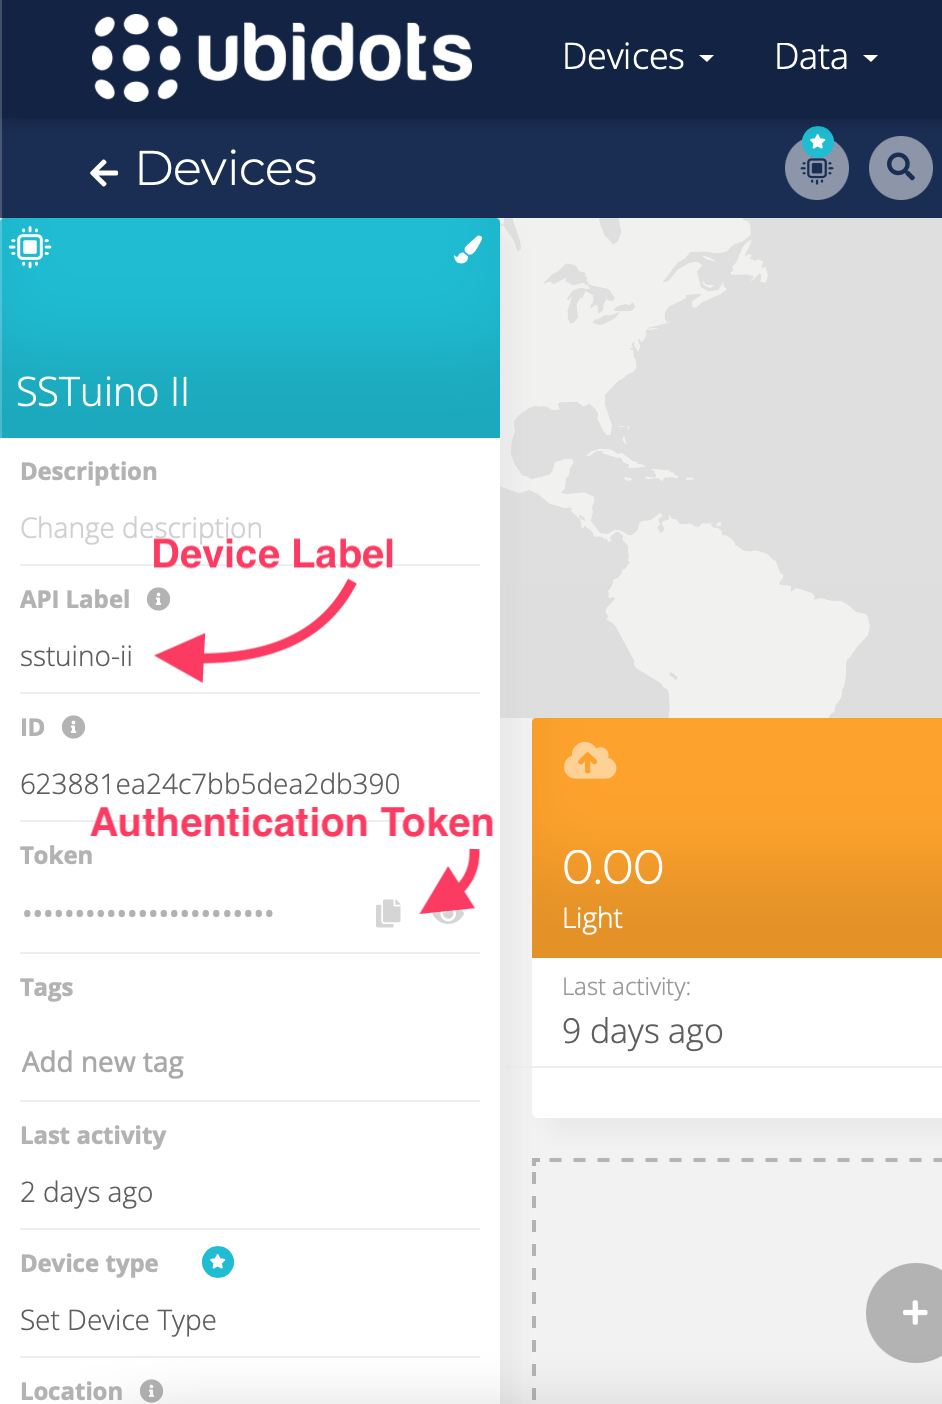
Go to your SSTuino II device and copy the Token and API Label to your app as shown below:
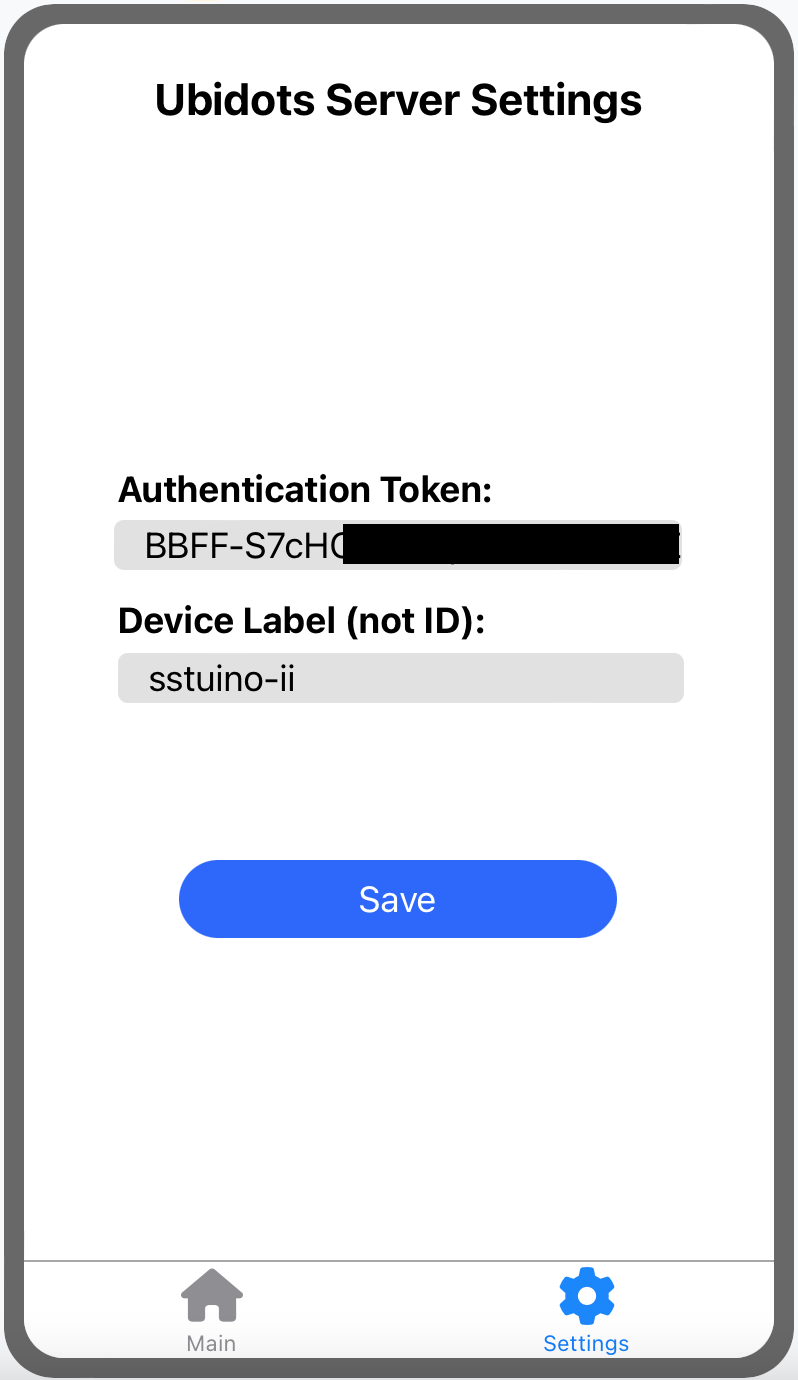
Don't forget to press Save!
Retrieving Variables from Ubidots
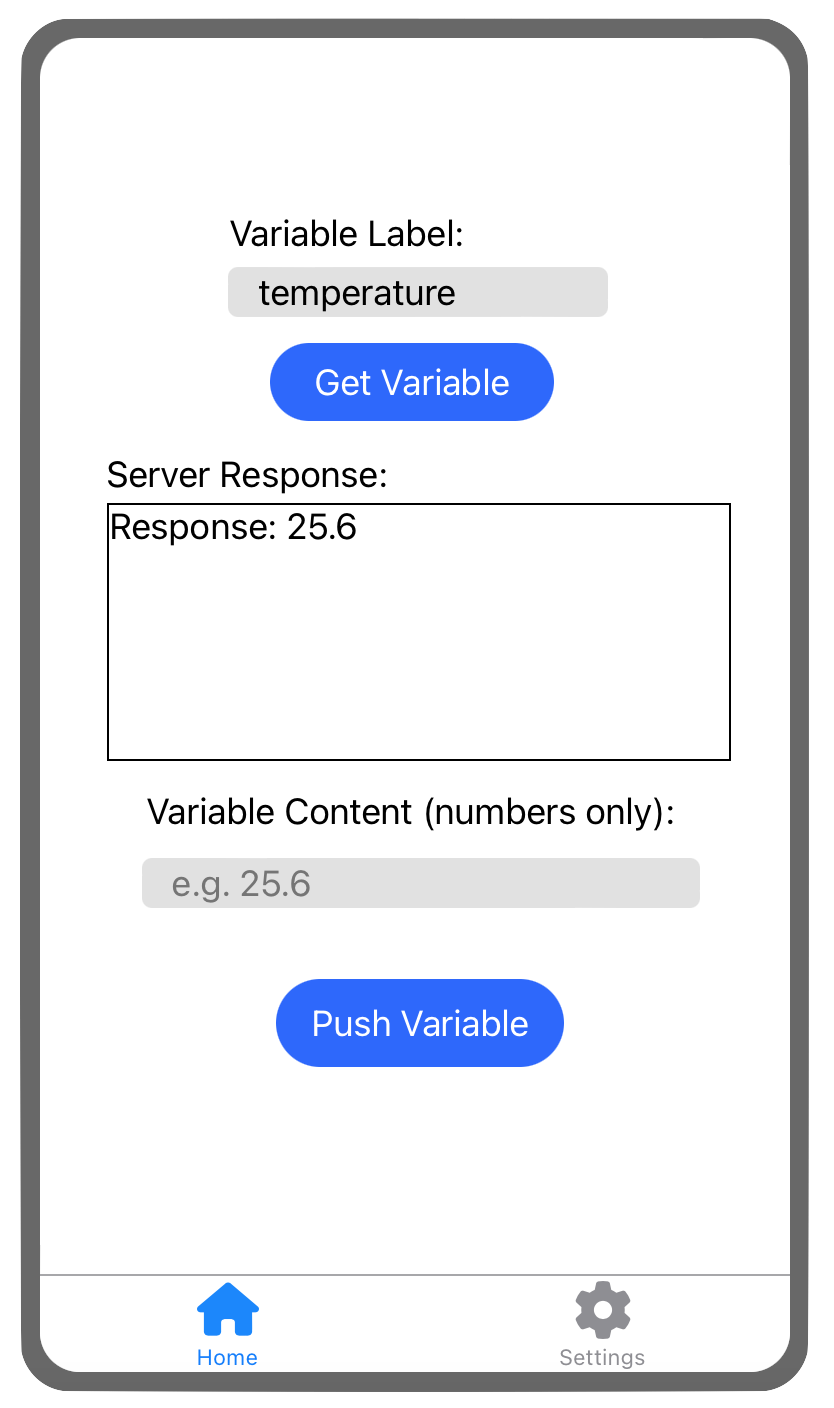
Time to go back to the Home screen and try getting a Variable from Ubidots! You just need to type the name of your Ubidots Variable (like “temperature” or “light”) into the “Variable Label” text box and press “Get Variable”.
If everything goes right, Ubidots should respond with the last value that was received:
If you didn’t see the above, you might want to double-check some of your settings with the Common Issues list below:
| Error | Solution |
The server responds with {"code": 404001, "message":"The request was not found."} | You might have entered one of the following things wrongly: the Variable Label on the Home screen, or the Device Label on the Settings screen. |
The server responds with {"code": 401002, "message": "Incorrect authentication credentials."} | You have entered an incorrect Authentication Token on the Settings screen |
The response is empty (e.g. it just shows Response:) | Double-check your Variable in Ubidots, was any data ever created on that Variable channel? This happens when there are no pre-existing data for that Variable. |
Sending Variables to Ubidots
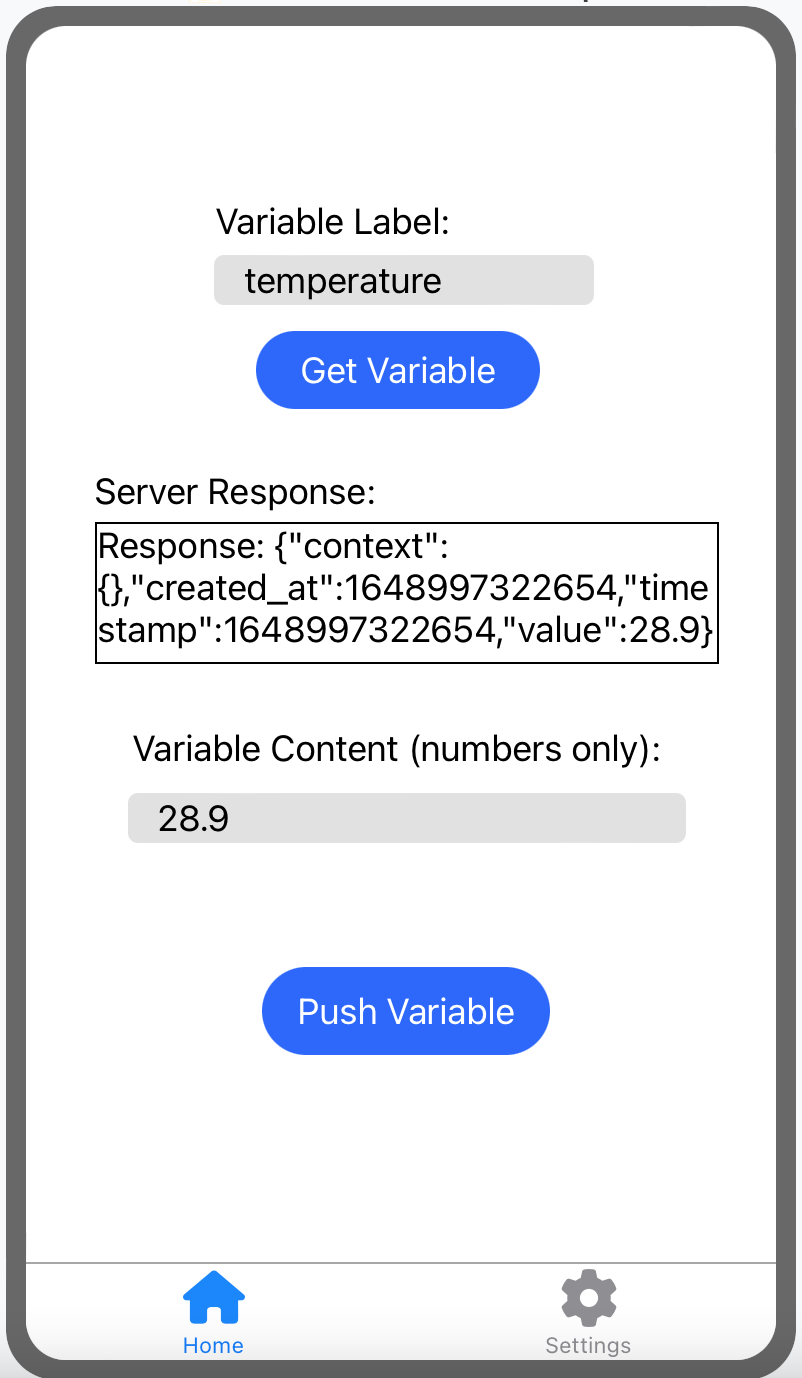
To send data to a Ubidots Variable, we need to also fill in the “Variable Content” field below on what we want to send to Ubidots. In our example, we can send a temperature value of 28.9 to Ubidots by pressing the “Push Variable” button to send this value to the Variable in Ubidots.
Video coming soon! Thank you :) Temperature will be changing on the dashboard as the phone sends data
If all goes well, you should see the message above telling you that the value has been recorded. If not, check out some of the Common Issues listed below:
| Error | Solution |
The server tells me I don’t have permissions to create a new variable: Error: {"error": {"message": "The user has not permissions to create a new variable.","code":403001}} | You might have keyed in the wrong Device Label in the Settings screen |
The server responds with {"code": 401002, "message": "Incorrect authentication credentials."} | You have entered an incorrect Authentication Token on the Settings screen |
The server responds with {"error": {"message": "The value NaN is not in a valid range.”,"code":4000013331}} or {"code":400001," message": "The payload sent is not a valid json document."} | Looks like you entered some text in the Variable Content field! Remember that Ubidots only accepts numbers. |
Understanding the code
We can now start to look at the code in Thunkable piece by piece to understand what it does, and how it works. There are a few sections of the block codes to understand:
- Stored Variables
- Button Click
- What's an Object?
- Getting Data from Ubidots
- Sending Data to Ubidots
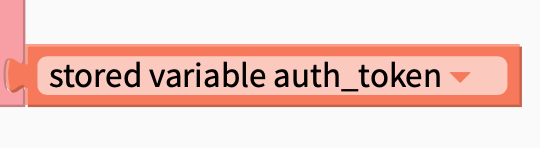
Stored Variables
Stored Variables are very much like the App Variables we previously used, but they will persist even after you close and reopen the app. App Variables, on the other hand, get reset after the app is closed.


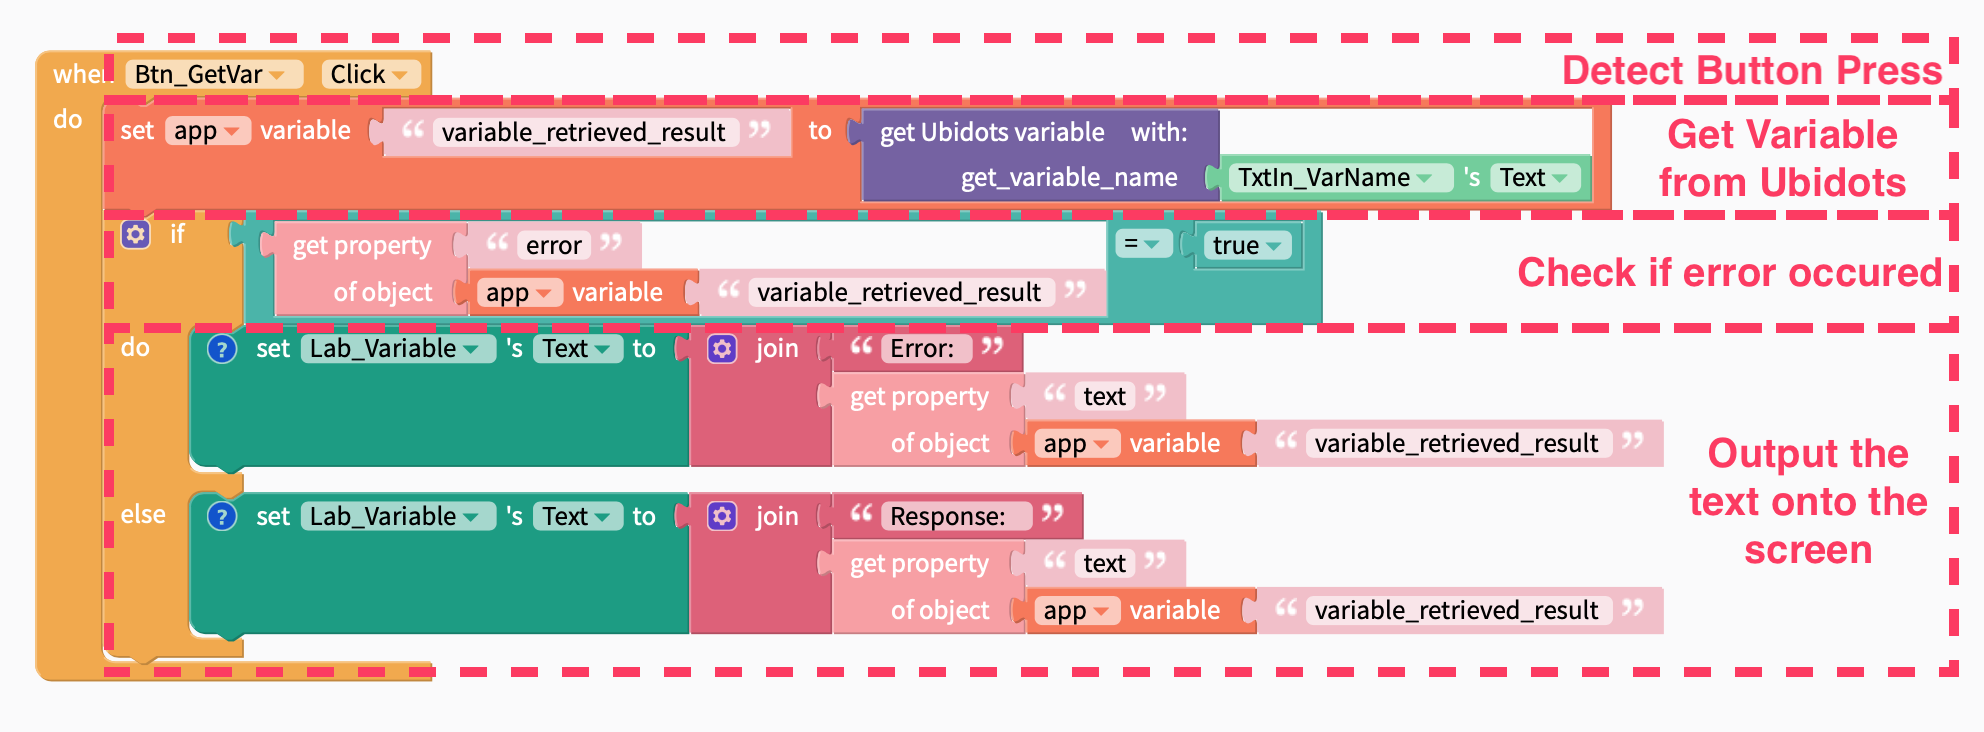
Button Click
This part is almost entirely similar to what you did in the previous exercise in Part 1.
Firstly, the app needs to detect the button click from the two buttons to either retrieve or send a data point. (See "Detect Button Press" in the diagram)
After that, it sets a variable to be equal to the result of the request from Ubidots. At this point, your app will connect to Ubidots and ask for the information. ("Get Variable from Ubidots" in the diagram)
Once the information has been downloaded, it is stored in an object which has two properties: “error” and “text”. The property “error” is a boolean (true/false value) that indicates whether an issue has happened with the connection and “text” is a string (alphanumeric text) that contains the response of the server (if no error occurred) or the error message (if an error occurred).
Our program here checks whether “error” is true, and shows the message with the words “Error:” in front of it. If not, the words “Response:” will be added in front of the incoming message and displayed on a label. (See "Check if error occurred" and "Output text onto screen" in the diagram)
What’s an Object?
At this point, you might be asking, what is an Object? An Object in Thunkable is a special kind of variable that can store many other variables inside it and you can retrieve the variables inside through names. The “names” that are used to retrieve variables are called “properties”.
For example, if I create an Object called “person” to represent a person, I would want it to have several properties like:
- Name
- Birthday
- Gender
..and the same applies for Thunkable! You can set and retrieve properties of an object using the “get property of object” function, and you can construct objects with the “create objects with fields” function.

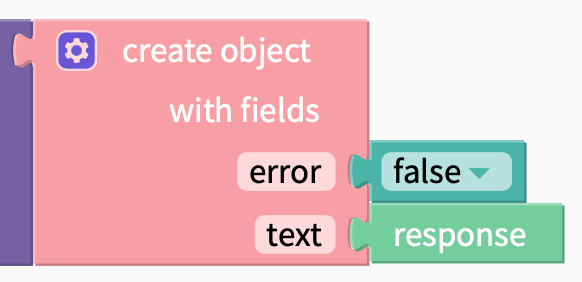
In this app, we use Objects to contain multiple variables (“error” and “text”) within one variable so that a function can output it (Remember that functions cannot output multiple variables).
Getting Data from Ubidots
This template makes use of custom functions to connect to Ubidots. Let’s start with getting data from Ubidots with the “get Ubidots variable” function.

For this function, there is only 1 input on the right side: the variable name. On the left side, the function outputs an Object with “error” (true/false, to indicate if an error happened) and “text” (the response from the server).
Sending Data to Ubidots
To send the data you want to Ubidots, you will need to use the “set Ubidots variable” function.
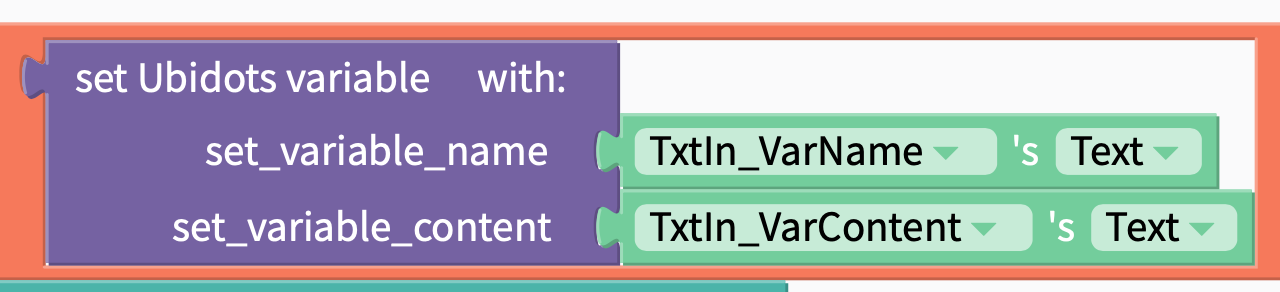
This function takes 2 inputs on the right side: variable name and variable content. Variable content must be a number as Ubidots only allows numbers. The function outputs the same Object as the “get Ubidots variable” function. If you wish to check if your data has been sent, you just have to simply check if the “error” parameter is false.
Conclusion
Over the past 2 tutorials, you have learnt the basics of building a mobile application using Thunkable and linking it to IoT services like Ubidots. In our next tutorial, you will be building a full IoT solution to increase energy efficiency in our heartland: kopitiams!