Capstone Project
In the recent Singapore Budget Debate of 2022, a total of $64 million was invested under the Cities of Tomorrow programme to spur the innovative use of energy-efficient technologies.

With the recent instability in fuel prices, many Singaporean Food and Beverage (F&B) outlets had to pass on the increase in electricity bills to their customers buying their food.
Objectives
A Kopitiam owner in Singapore wishes to save on energy costs by turning off the fans when the Kopitiam is cool enough or when there’s nobody at the Kopitiam. In addition, he also wishes to be able to remotely control the lights so that the lights turn on and off automatically through an IoT automation. For our final project, you have been tasked to design and build a prototype of an Internet of Things hub for a Smart Kopitiam. Let’s get started!
Our device will need to do two things:
- Sense the temperature and human presence to determine if the fans in the Kopitiam need to be turned on. The fans are connected to another IoT device and are not connected to this hub physically, so we only need to send temperature and presence data.
- Receive commands from the Internet to turn lights on and off. The lights are connected to this hub physically so we will need to toggle a pin on and off to demonstrate this.
Given the objectives, we will need 2 sensors (input) and 1 actuator (output). The TMP36 temperature sensor and the Passive Infrared (PIR) sensor will be used to detect temperature and human movement respectively. For the output side of things, we will have a single LED to represent the light that we are controlling.
Ubidots Setup
In our previous examples, we have already set up two Variables in Ubidots: Temperature and Light. We just need to add one more variable to represent human movement, called “Motion”.
After this, let’s create a new Dashboard called “Smart Kopitiam” so that you can have an overview of all the controls and values. (Don’t forget to set the default time range to Last 1 Hour so it’s easy to see your data coming in!)
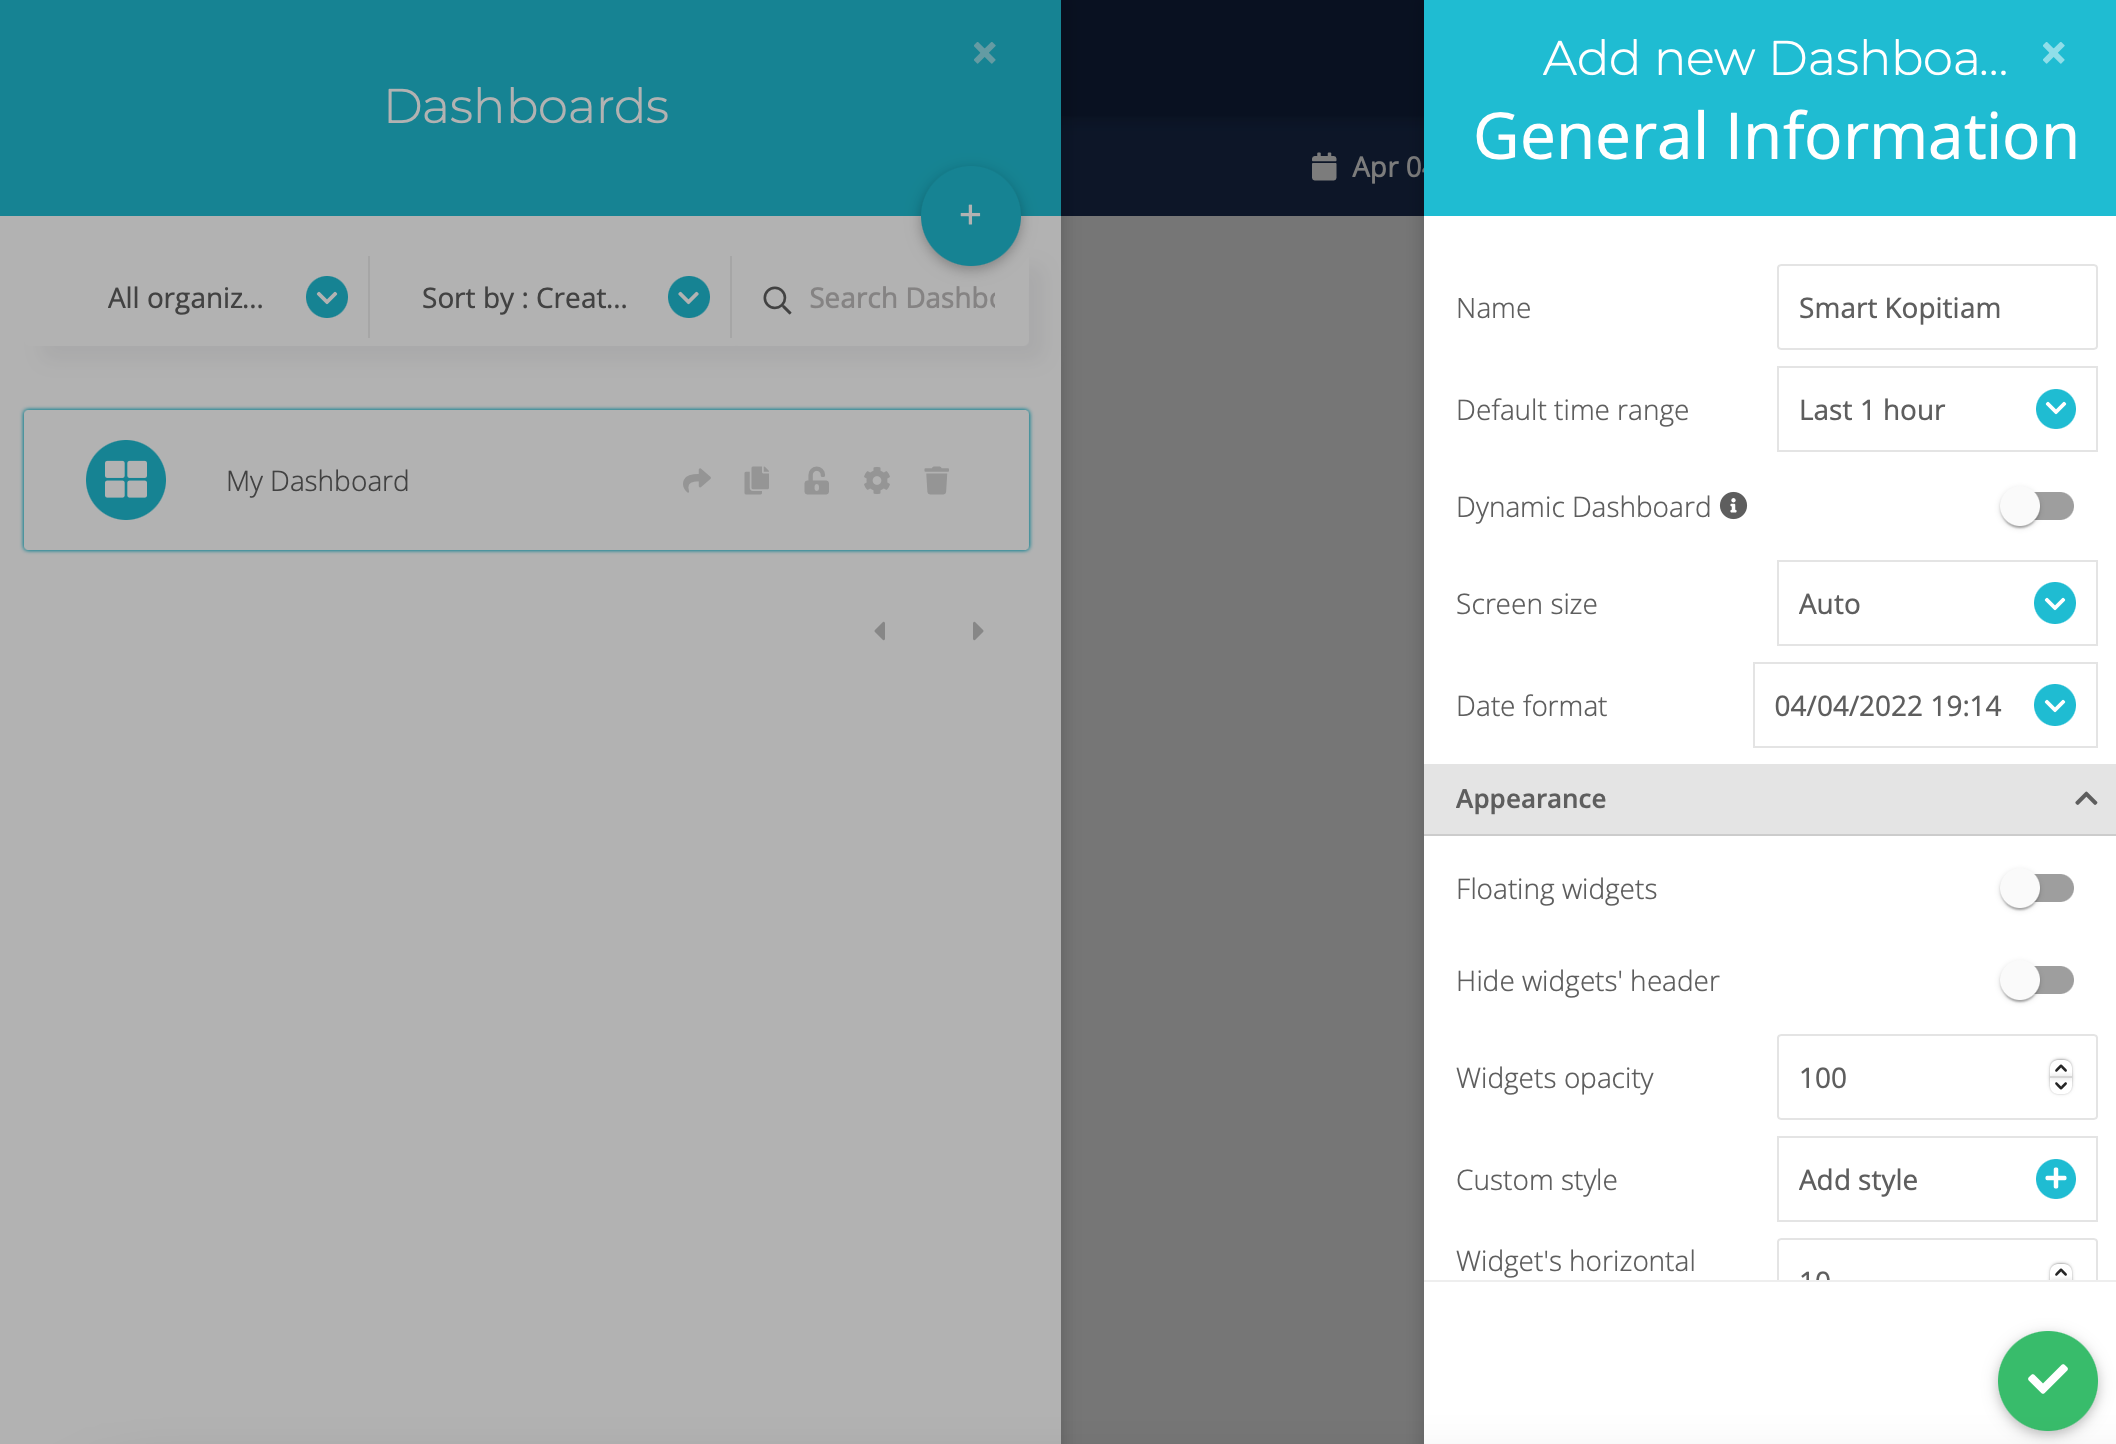
We now need to populate the dashboard with components to show controls for all 3 of the Variables: Temperature, Motion and Light.
Add 3 widgets and link them to the Variables mentioned above: Thermometer (to show temperature), Indicator (to show human movement), and Switch (to control the light).

Hooking up your SSTuino
Warning: To prevent damage to your Learning Device or your components, please do not connect the SSTuino to your LD or power supply when you are wiring up your circuit.
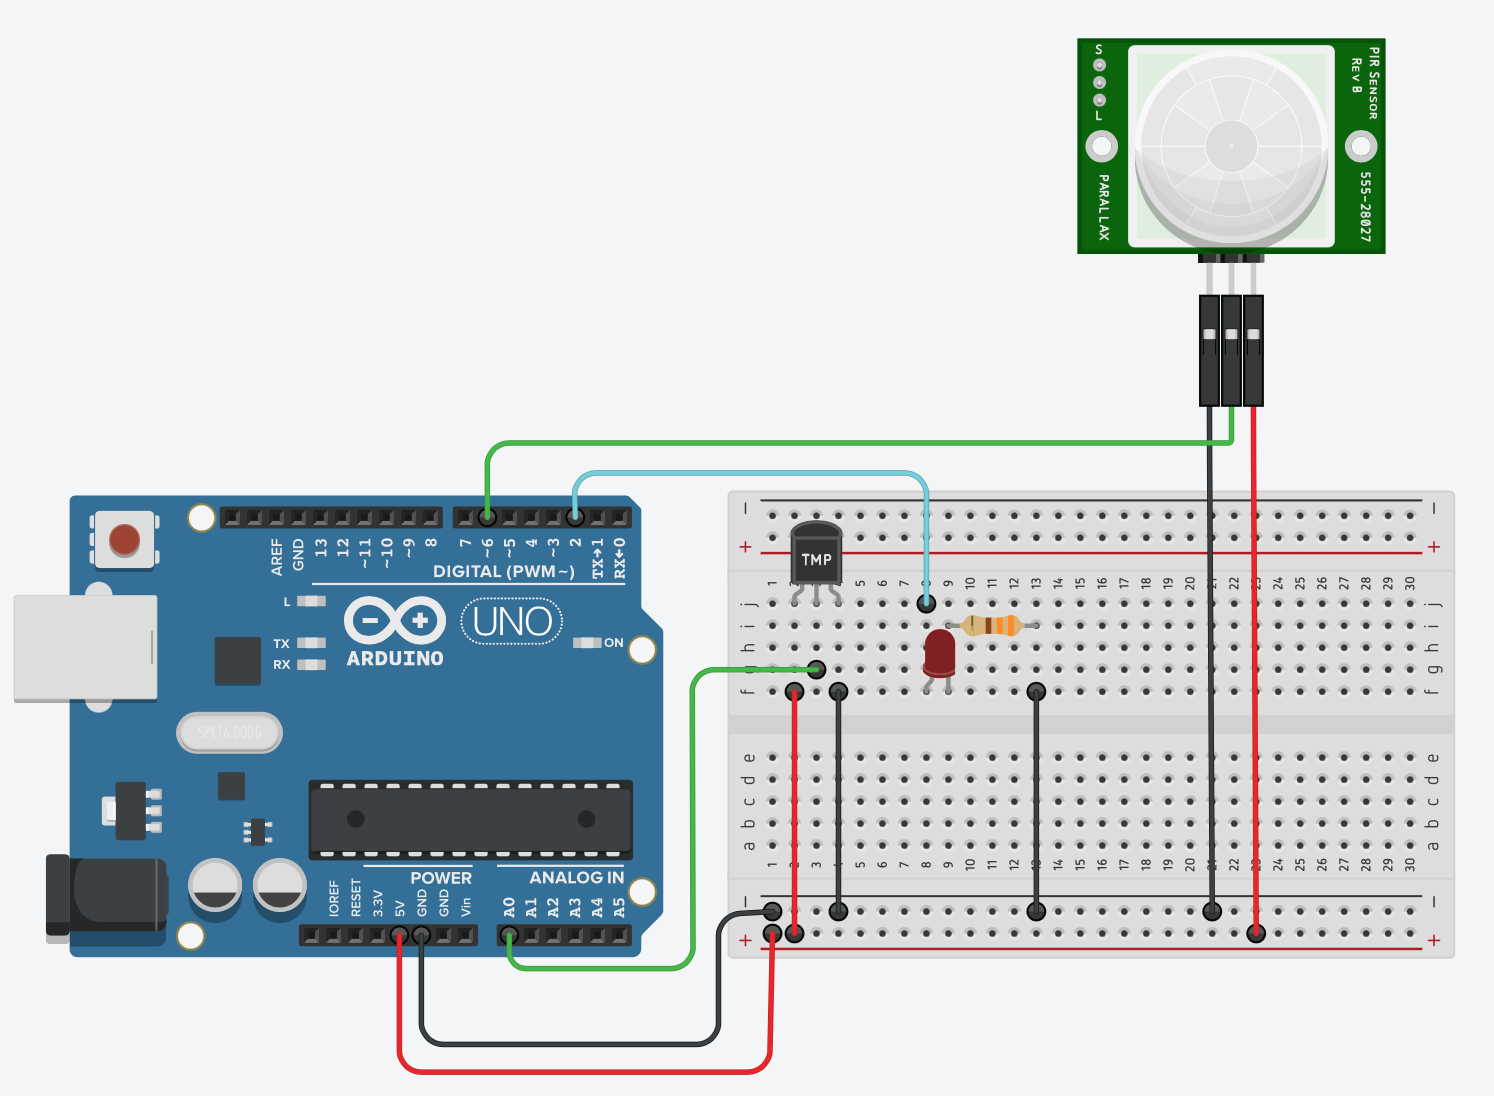
Let’s start to connect your SSTuino with the sensors we need for this project.
- PIR sensor: Pin 6
- LED: Pin 2
- TMP36 temperature sensor: Pin A0
You may start connecting your device like the diagram below:
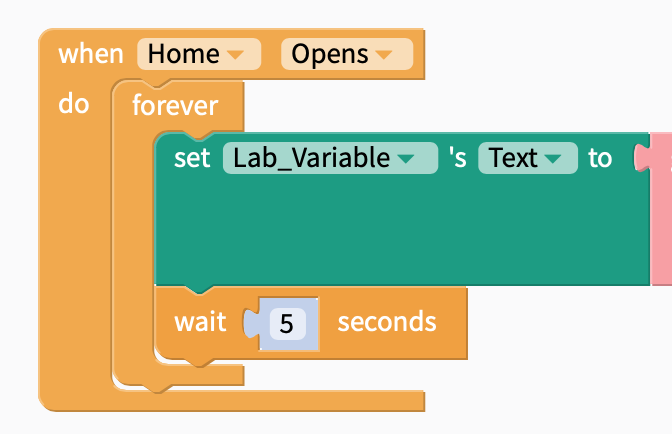
Programming the SSTuino
With the circuit connections done, it’s time to start programming your SSTuino to send and receive data from Ubidots. For this section, you will need to tweak the previous example code you have already built for sending data in both ways. Try it out!
Hints
- The previous code you made has 1 Variable sending and 1 Variable receiving. In this project, you need to send 2 Variables, and receive 1 Variable.
- Use what you have learnt in From Blocks to Code Part II, how would you avoid using the
delay()function and usemillis()instead?
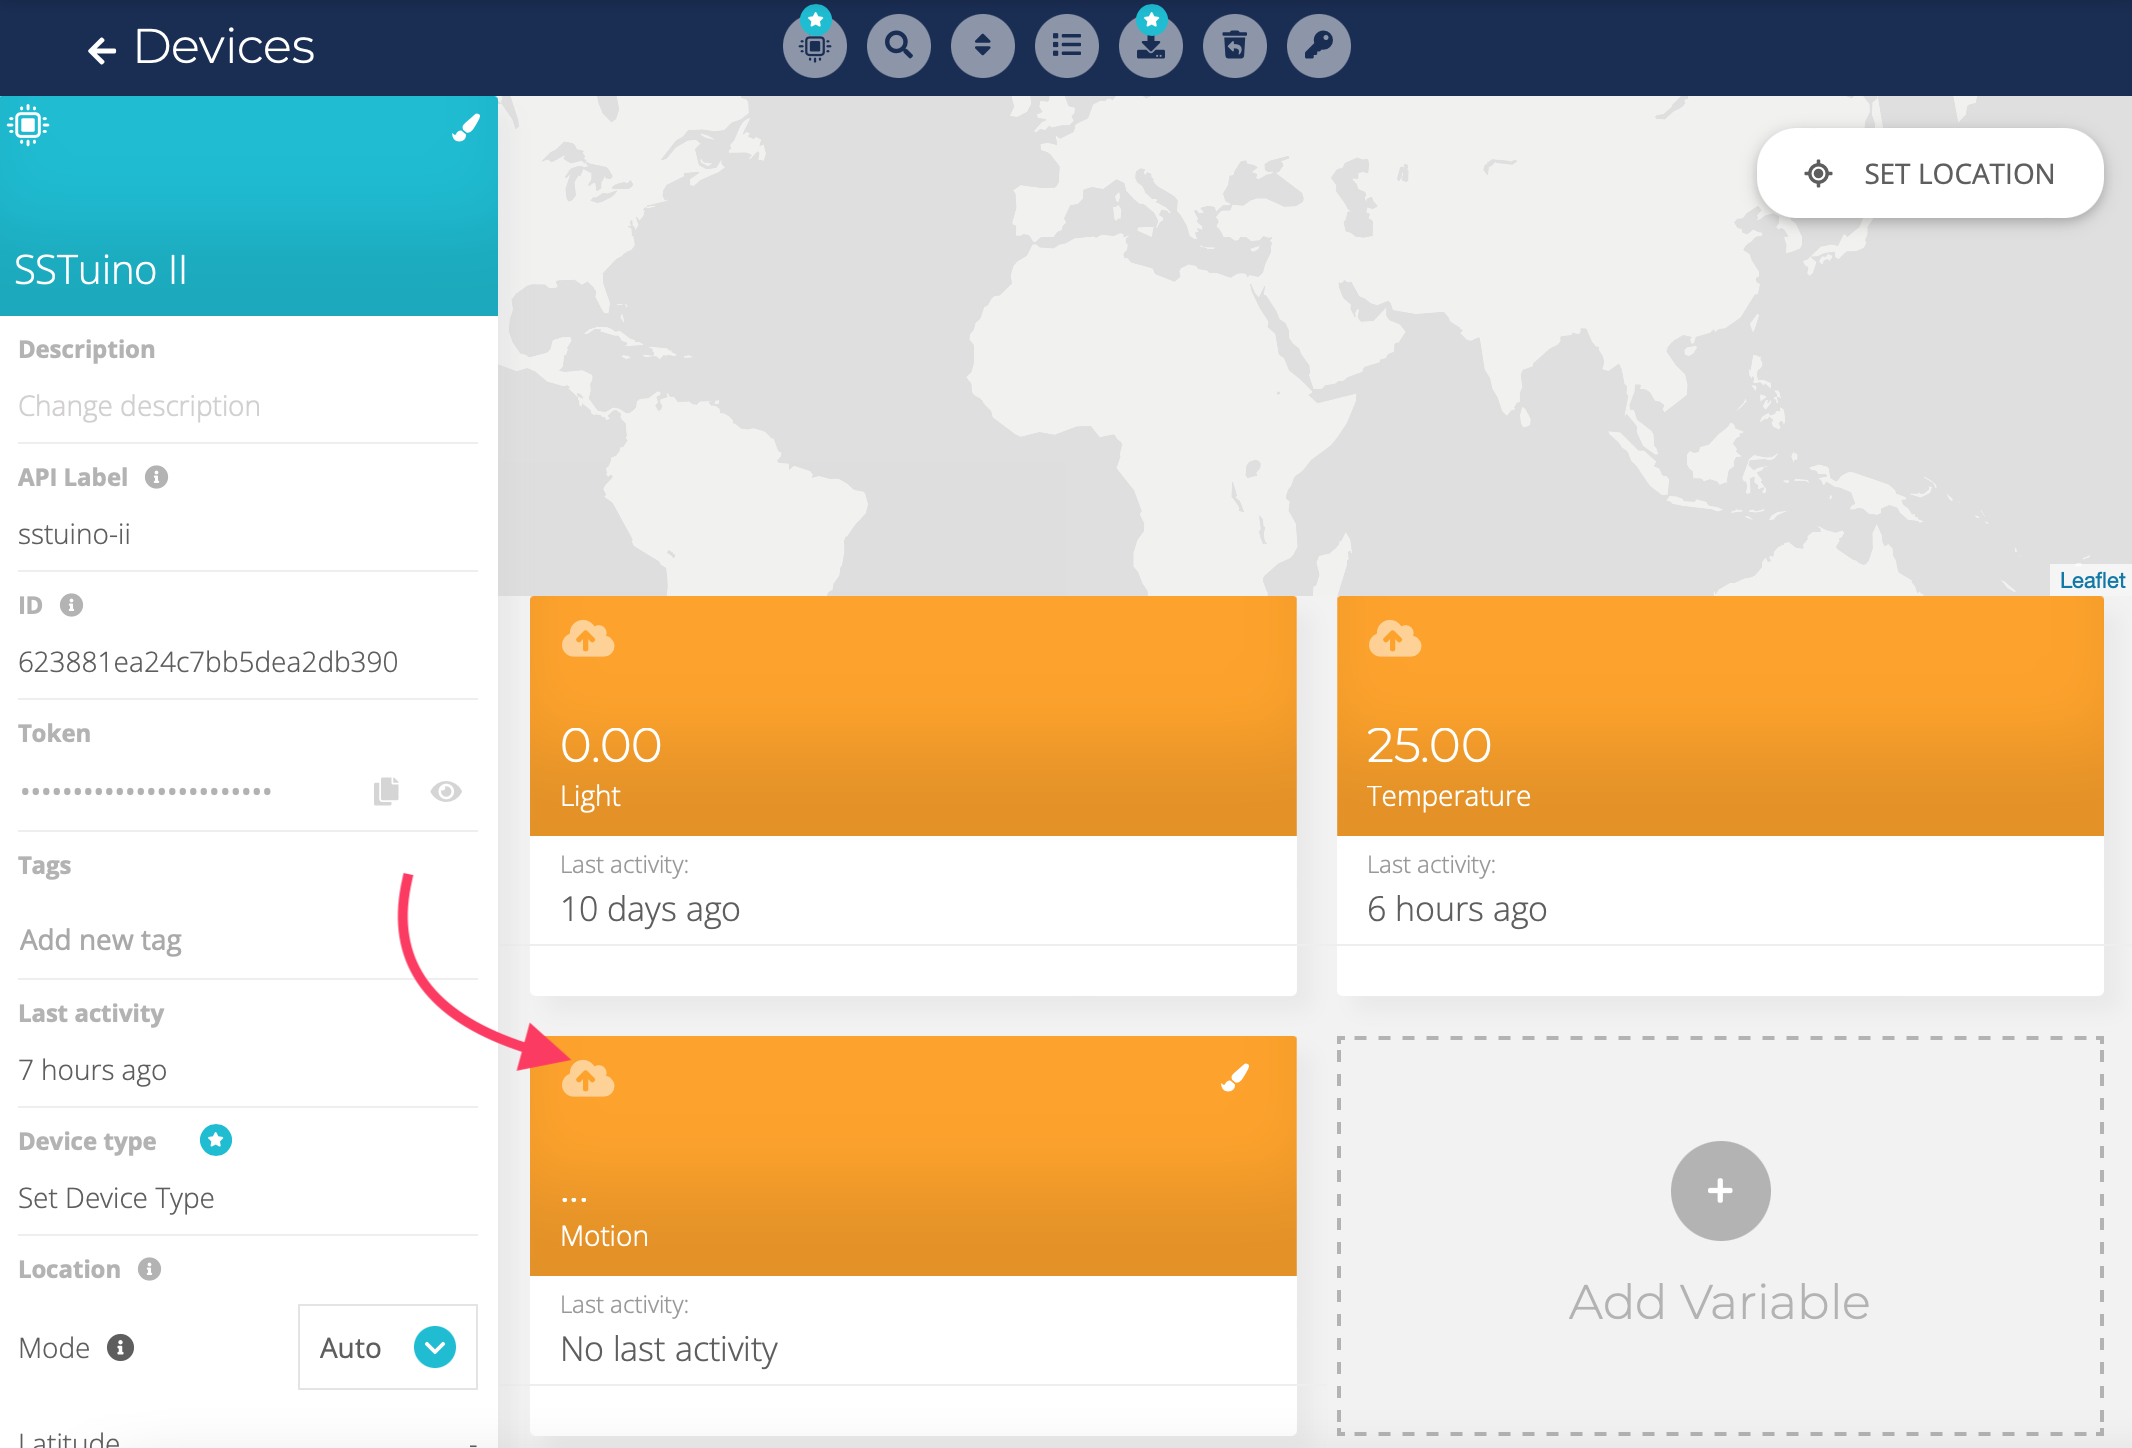
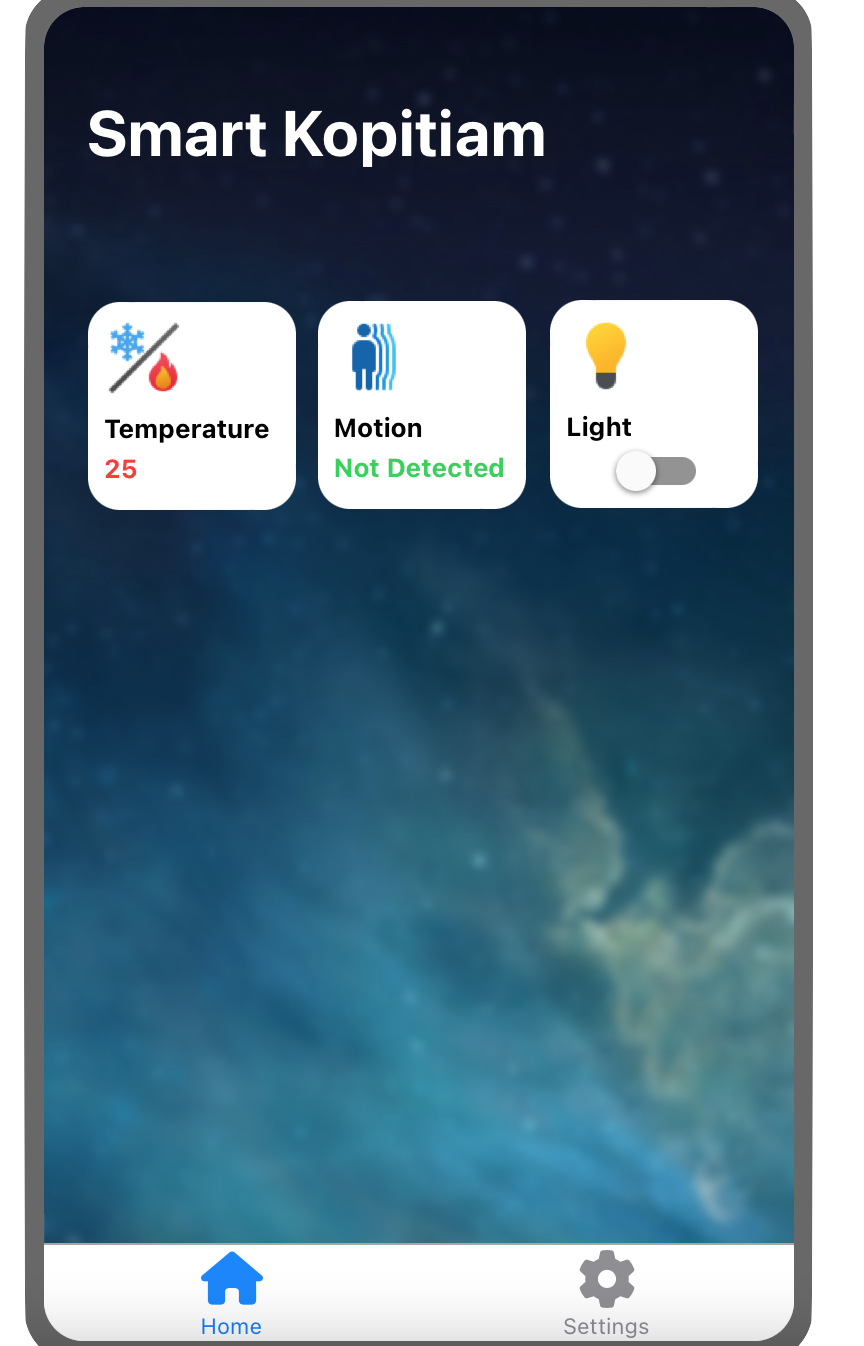
By the end, you should see something like this appearing on your Smart Kopitiam dashboard, and you should also be able to control the light using the Switch widget on the dashboard.

Making an app to control it 😄
Once you are satisfied with your program, it’s time to make an app to control it!
We have provided an app template with the basic functions to connect to Ubidots and the general layout of the app:
You will need to link up the rest of the code yourself. We have placed the 3 important controls on the app, named:
- Switch_Light - Light switch
- Label_Motion - Text label indicating motion
- Label_Temp - Text label indicating temperature
Hint: If you want to fetch a Variable automatically from Ubidots and display it on a label, you can use something like the code below:
Conclusion
If you have completed your Capstone project with a fully working mobile app, circuit and program, congratulations! You have completed the SSTuino II Essentials Track.
Please help us out by completing this short 5-minute survey about your experience learning about the Internet of Things and how to use an Arduino. Thank you! 😀
If you feel like you are up for a challenge, or just wish to learn more about how to build different solutions with your SSTuino II, we have something in store for you! Our team is currently working on the Advanced Tracks, which will give in-depth tutorials on using the SSTuino II in scientific inquiry, or building advanced mobile apps with Swift Playgrounds. Stay tuned 😊