Variables and Operators
In this tutorial, we will cover the usage of variables and AND/OR Operators.
Table of Contents
Naming your variables
After some tinkering with your coding, you may realise that it may be a hassle to change for example a pin, like this example code:
void setup()
{
  pinMode(13, OUTPUT);
}

void loop()
{
  digitalWrite(13, HIGH);
  delay(1000); // Wait for 1000 millisecond(s)
  digitalWrite(13, LOW);
  delay(1000); // Wait for 1000 millisecond(s)
}
Imagine that you would have to change all the pin 13 to another pin, and would have to scan through the entire code just to change all these values! Isn't it a hassle to change all these numbers?
Introducing... Variable names. 😎 Here is a modified version of the code above:
int LED = 13;
int wait = 1000;

void setup()
{
  pinMode(LED, OUTPUT);
}

void loop()
{
  digitalWrite(LED, HIGH);
  delay(wait); // Wait for 1000 millisecond(s)
  digitalWrite(13, LOW);
  delay(wait); // Wait for 1000 millisecond(s)
}
Voilà! I have managed to change all the numbers to variable names. For example, in the event I want to adjust the delay() function in the code, I just have to change the 1000 in the int wait=1000; into a different number! Now that's straightforward. How about you try it out now?
Logic Operations
Logical operations are introduced when we need to evaluate related expressions to return a single value. For this tutorial, we are going to introduce the AND/OR Operators.
Some history...
Back when technology was not this advanced, the various operators were actual hardware logic gates that were placed into the circuit. The chips looked something like this:
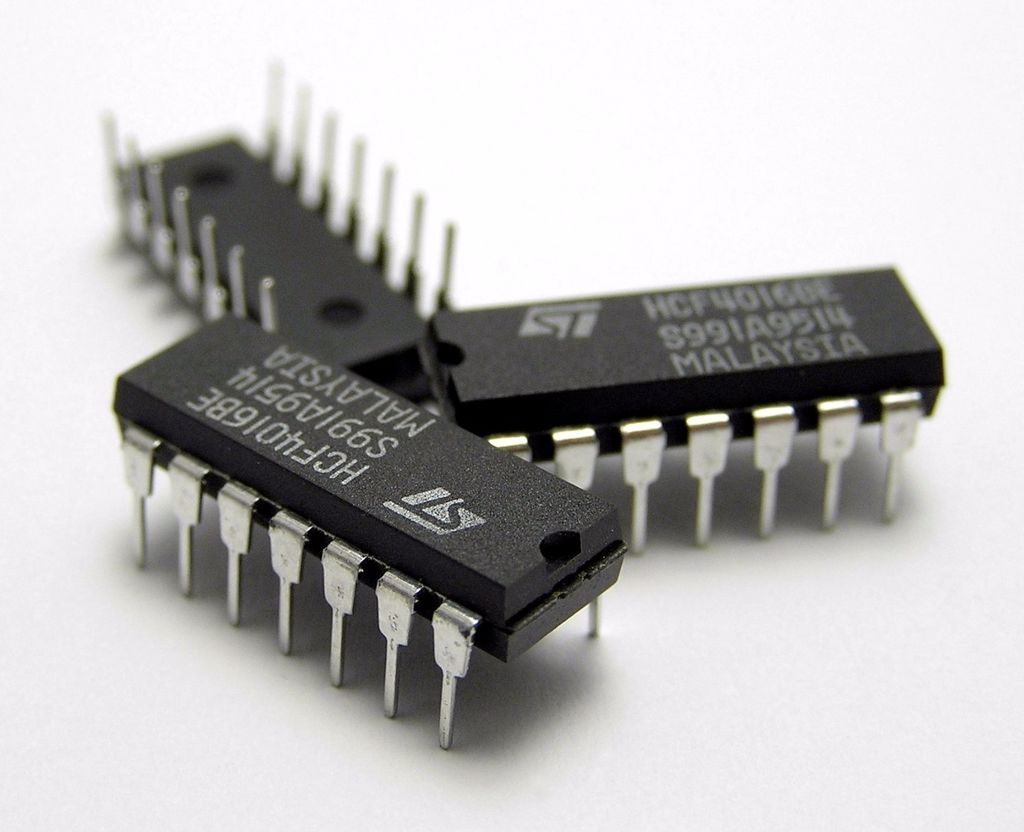
Technology has come a long way, squeezing billions of transistors inside a single chip to provide us with a fast, modern computer.
AND Operator
How it works is that if both Input 1 and Input 2 are high, it will give a high output, as illustrated in this table (emojis added to help you understand 😄):
| Input 1 | Input 2 | Output |
| 0 😡 | 0 😡 | 0 😡 |
| 0 😡 | 1 🙂 | 0 😡 |
| 1 🙂 | 0 😡 | 0 😡 |
| 1 🙂 | 1 🙂 | 1 🙂 |
OR Operator
How it works is that if either Input 1 OR Input 2 are HIGH, it will give a HIGH output. If both Inputs are HIGH, it will also give a HIGH output, as illustrated in this table (Emojis added to help you understand 😄):
| Input 1 | Input 2 | Output |
| 0 😡 | 0 😡 | 0 😡 |
| 0 😡 | 1 🙂 | 1 🙂 |
| 1 🙂 | 0 😡 | 1 🙂 |
| 1 🙂 | 1 🙂 | 1 🙂 |
OR Operator exercise
Let us create a new circuit in TinkerCAD like this:
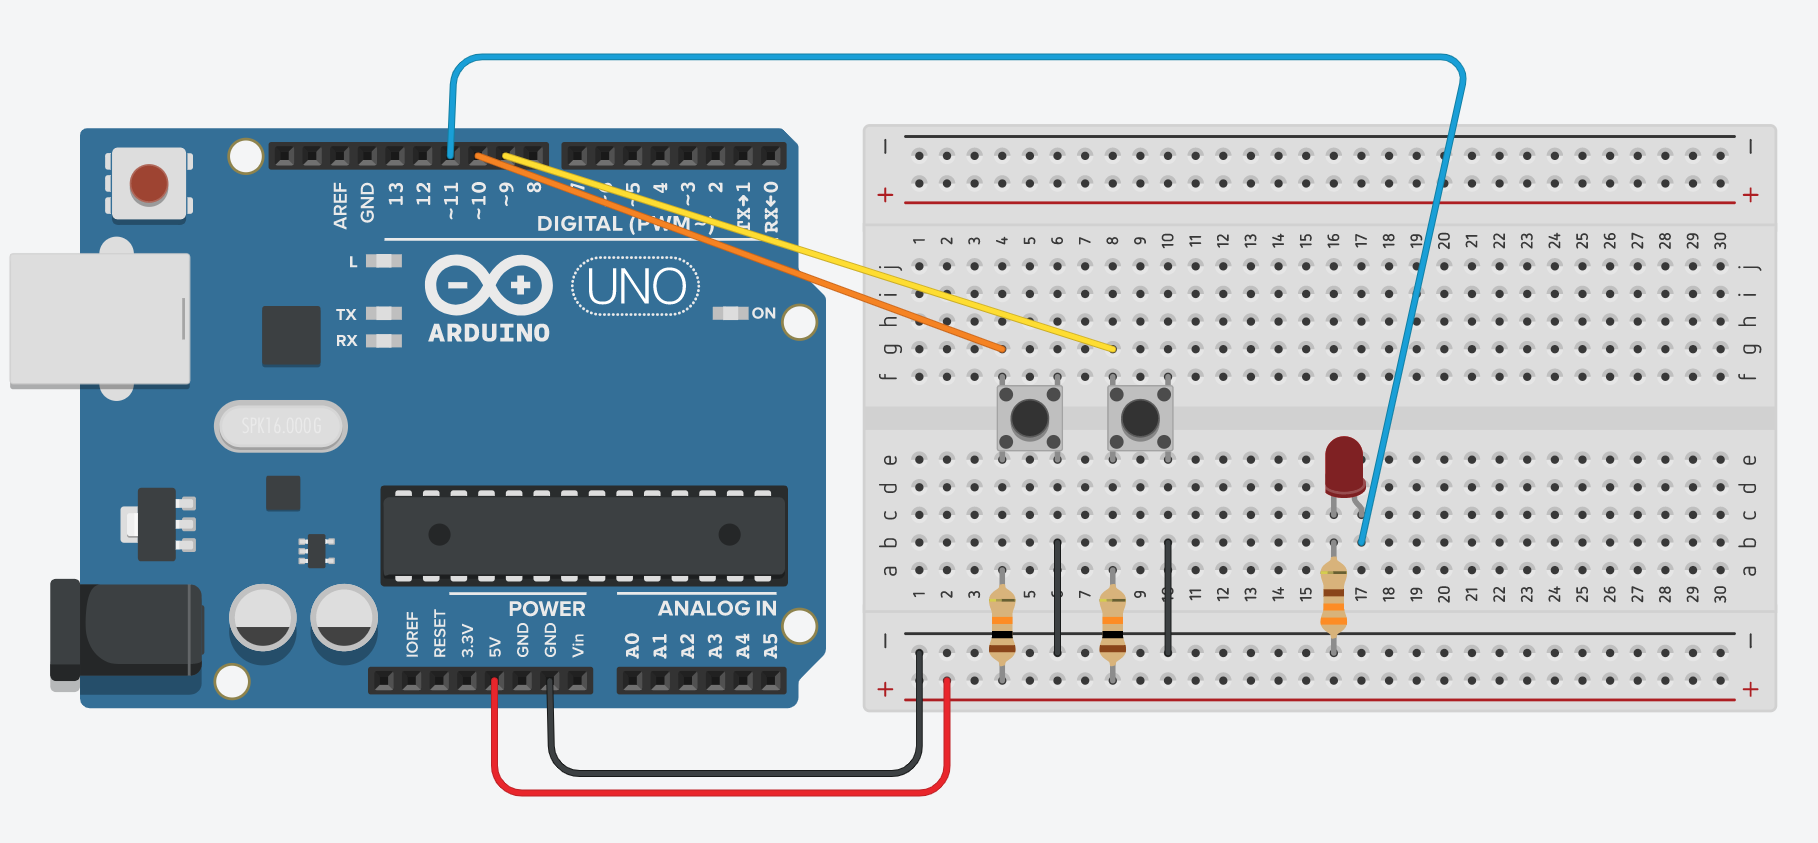
Next, we will need to edit the code such that the LED would light up once one of the buttons is pressed:

You would see this when you start simulation:
Here is what it looks like on the SSTuino:
Warning: To prevent damage to your Learning Device or your components, please do not connect the SSTuino to your LD or power supply when you are wiring up your circuit.
AND Operator exercise
With the same example, we just have to change one part of the code to this:

Tip: To activate the two buttons, you would have to press and hold SHIFT on your keyboard while clicking the buttons to activate both buttons.
You would see this when you start simulation:
Here is what it looks like on the SSTuino:
Warning: To prevent damage to your Learning Device or your components, please do not connect the SSTuino to your LD or power supply when you are wiring up your circuit.
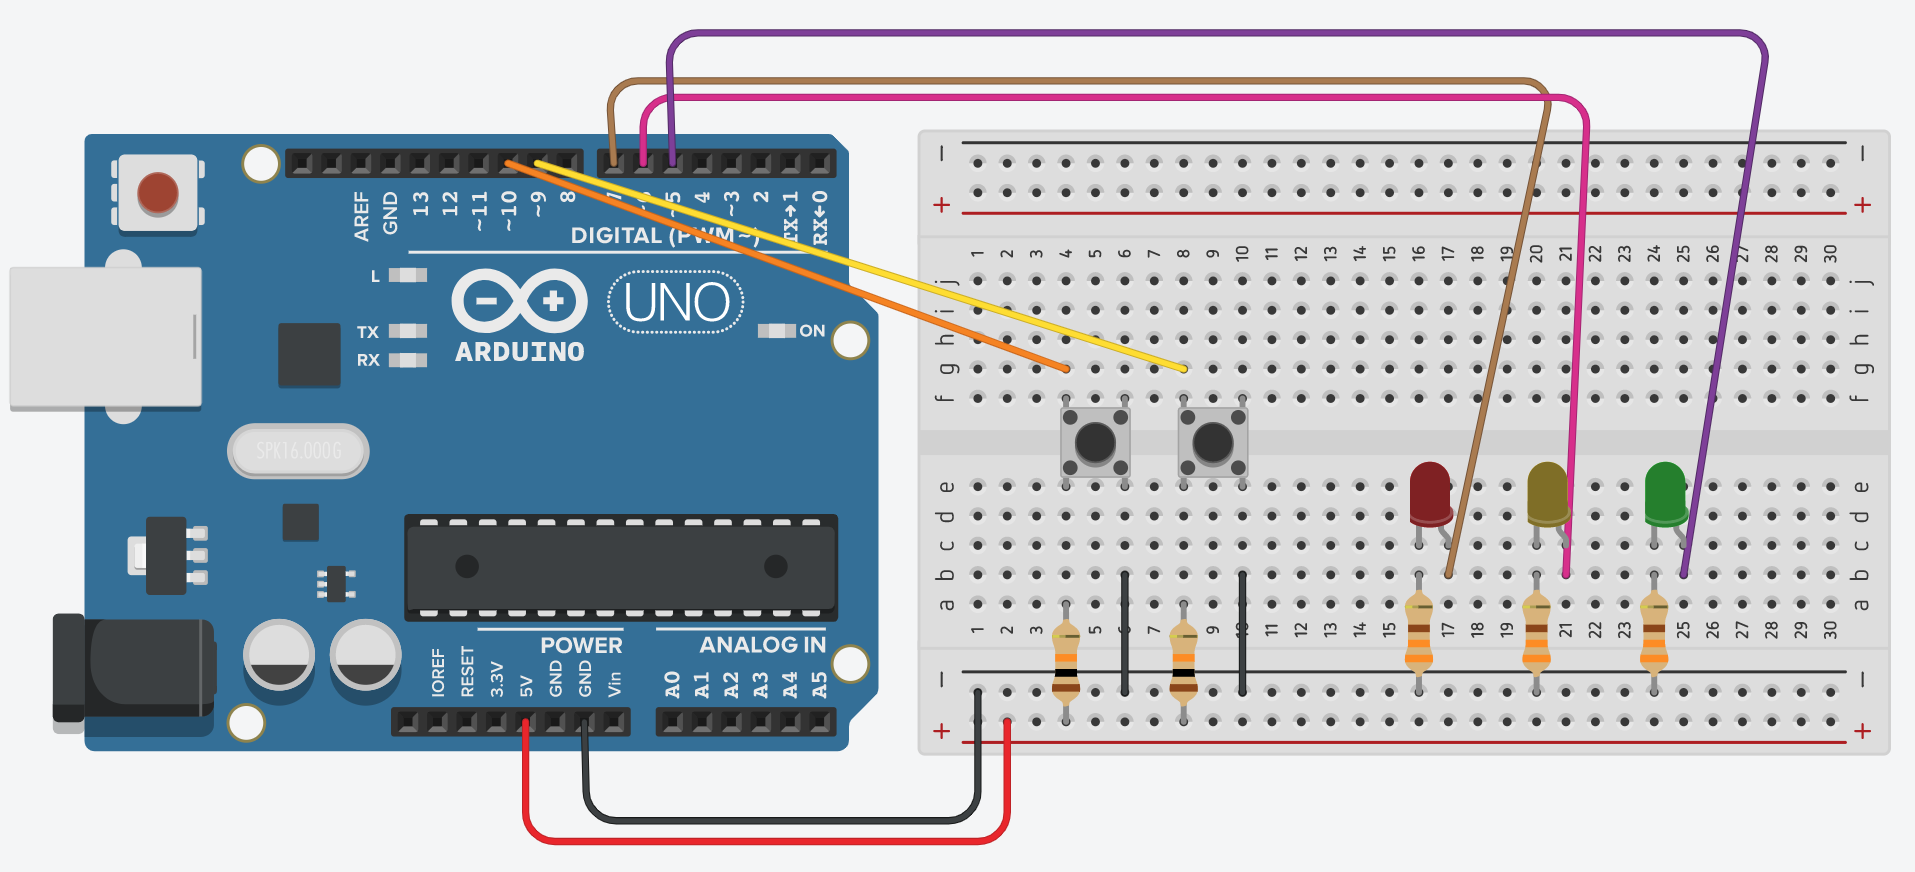
Drag Race example
Let us duplicate the circuit we have just created in the previous section.
We will need to have 3 LEDs this time, to show that:
| Button 1 | Button 2 | Output |
| Not Pressed | Not Pressed | Red LED |
| Not Pressed | Pressed | Yellow LED |
| Pressed | Not Pressed | Yellow LED |
| Pressed | Pressed | Green LED |
The circuit is built as shown:
How would you program this circuit?
Here is how I did it:
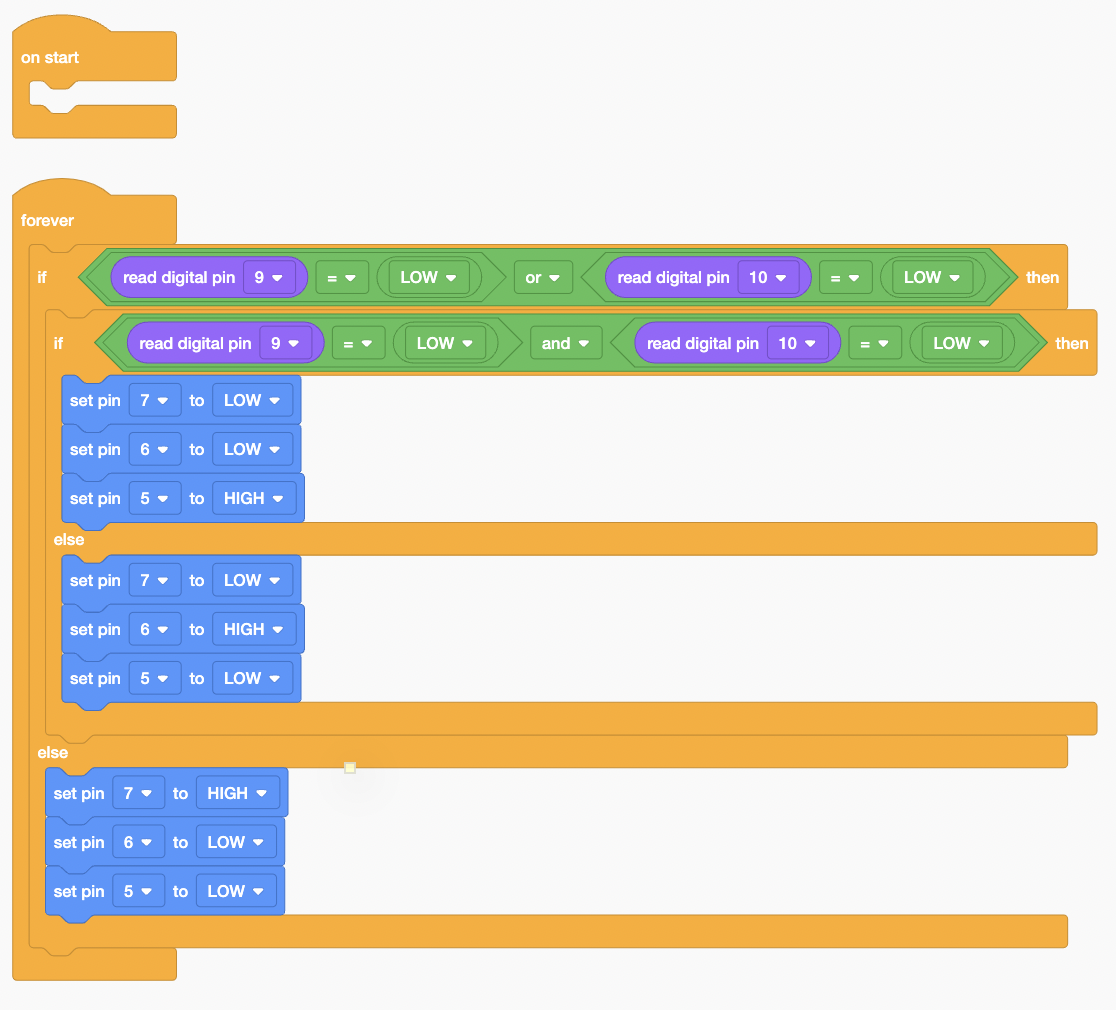
Here is how the code works:
- Are any of the buttons pressed? If yes go to 2, if not, Red LED.
- Are both of the buttons pressed? If yes, Green LED, if not, Yellow LED.
So would there be other ways to do it? Certainly! This is just one of the ways you can do it! There are many ways to make it work the same way also!
For the above code, this is what happens when I press Start Simulation:
Here is what it looks like on the SSTuino:
Warning: To prevent damage to your Learning Device or your components, please do not connect the SSTuino to your LD or power supply when you are wiring up your circuit.
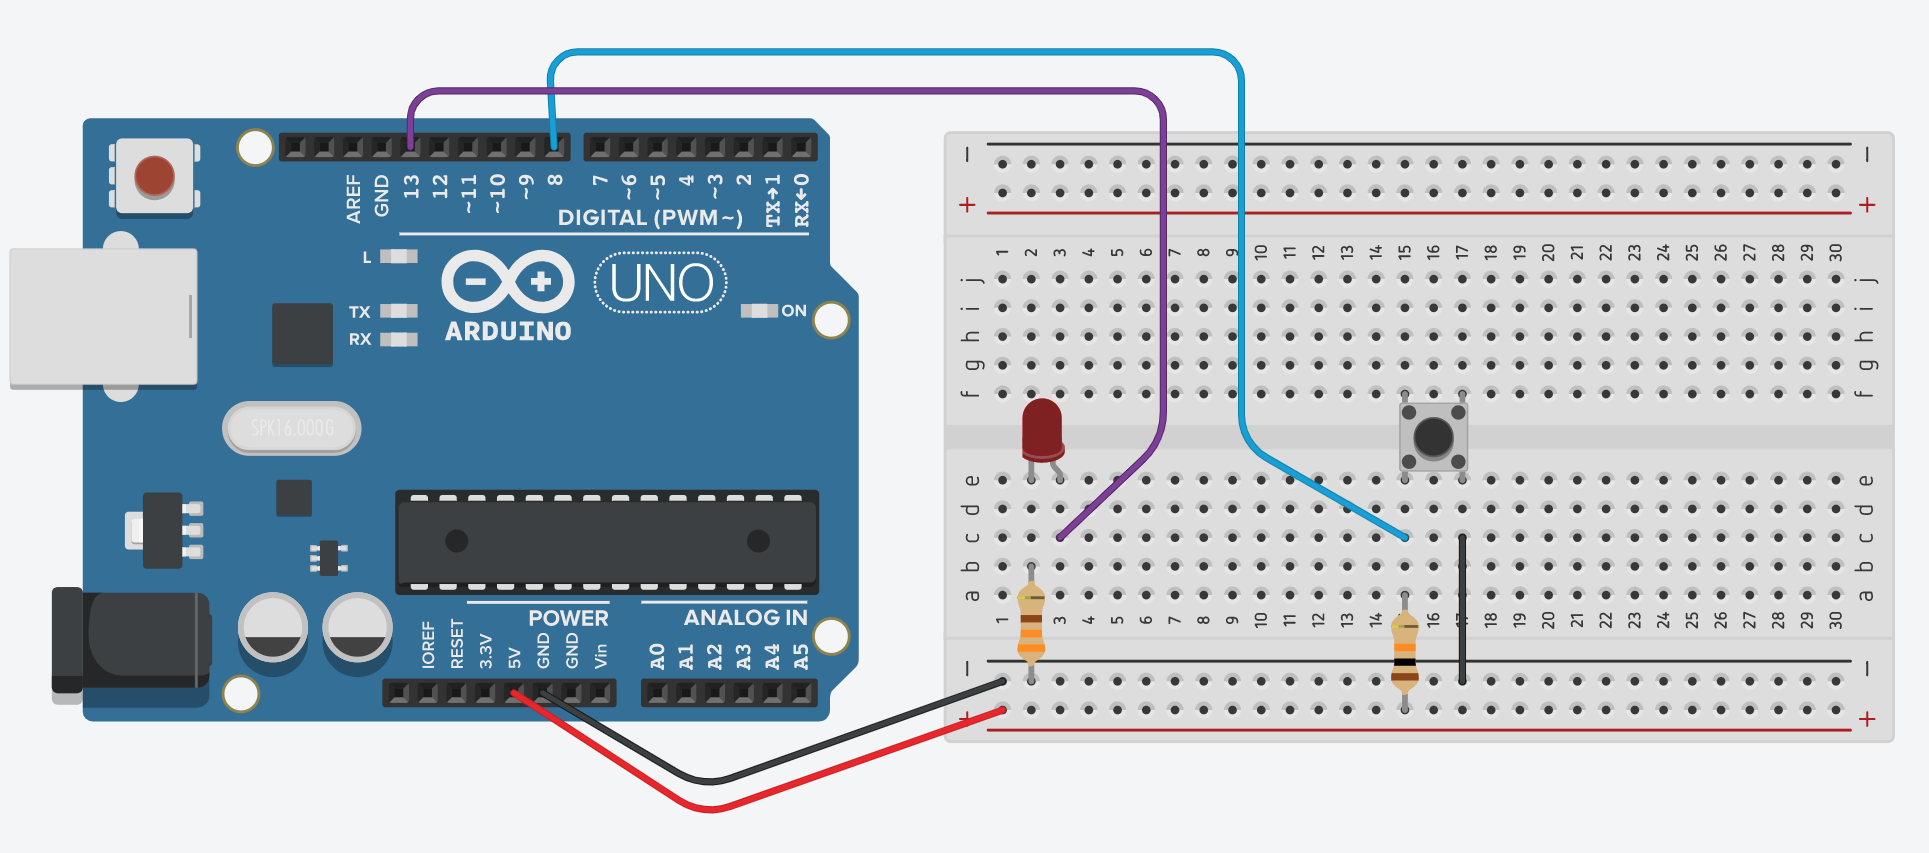
Toggle Switch
Let us assume that we only have a button to control our lighting. Based on previous examples, if you were want to light up the LED, you would have to press and hold the LED right? What if I was to use the washroom and want the lights to be on? I would then have to press and hold the button for the lights to remain on! 😱 To make our lives much better, we can make our button into a toggle switch with some coding... 🥳
Build a circuit as shown:
For the program, we would have to introduce variables. To create variables, navigate here:
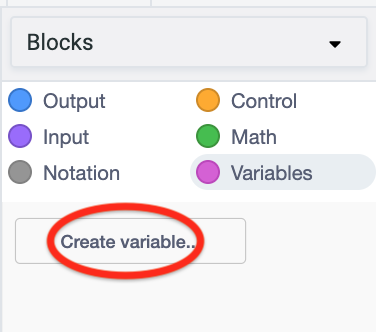
Create the variables btn and led. We are going to use these variables to store the state of the button and LED. What this means is that if the button is pressed, I change the state of the variable, and it will remember the state. This also means that if I press and hold the button, it does not spam the ON command. It will just activate once. Same with the LED.
Here is how the program can be coded:
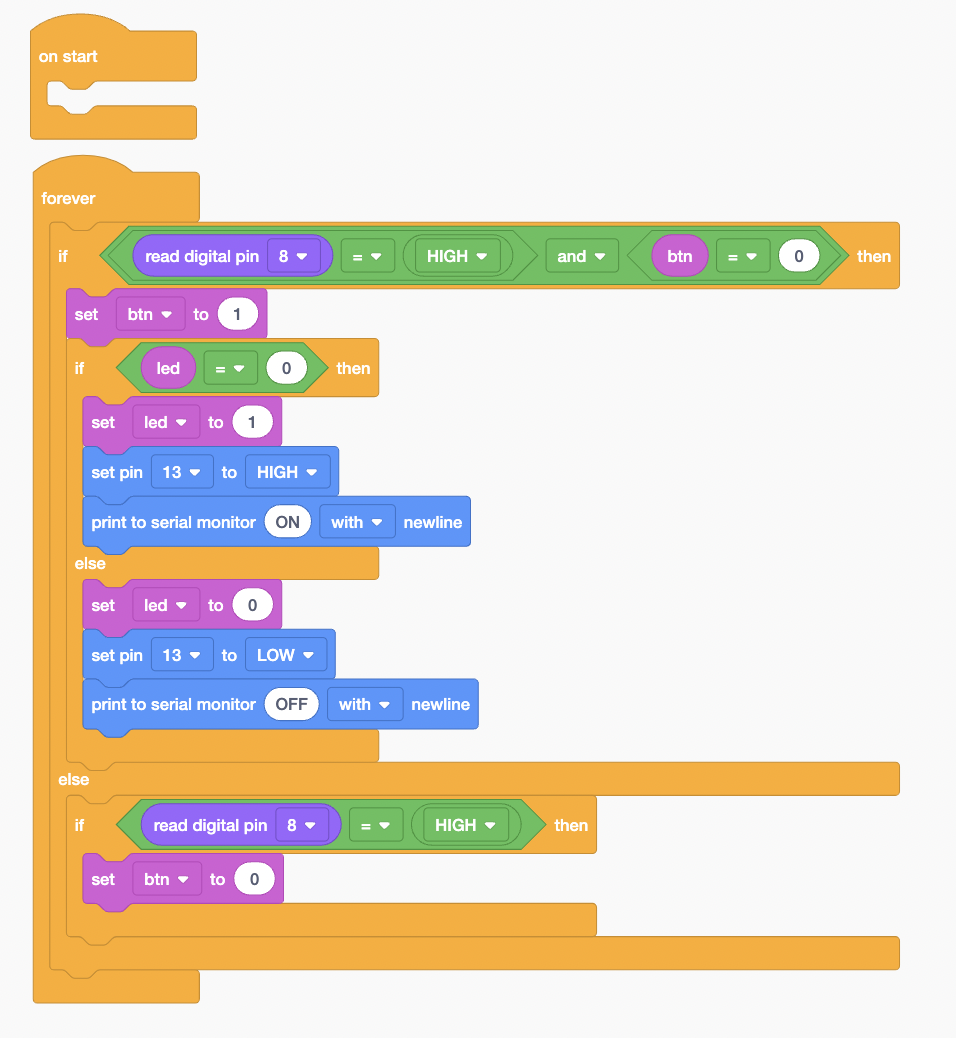
Tip: You can explore other ways of programming this too!
Did you manage to do it? If you did, that's great! Do help your peers out too!
You would see this when you start simulation:
Here is what it looks like on the SSTuino:
Warning: To prevent damage to your Learning Device or your components, please do not connect the SSTuino to your LD or power supply when you are wiring up your circuit.
Let's share your work! Record and post a video onto Instagram with the hashtag #sstuino!
Resources and Going Further
- Electronic Tutorials: Logic Gates
- Arduino Examples: Debouncing a Button - This tutorial shows how to record a button press correctly, as buttons are mechanical devices and will sometimes connect and disconnect while you press them down.