Potentiometer
In our first lesson on Advanced I/O, we are going to read data from the potentiometer and ultimately use it to control cool stuff!
Table of Contents
About the Potentiometer
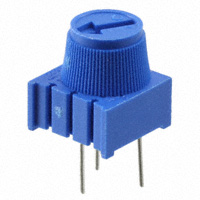
The potentiometer is essentially a variable resistor. But instead of having 2 pins, it has 3 pins.
Potentiometers are used frequently and commonly on electronic devices. A simple example would be the volume knob on speakers or the light dimmers in your house!
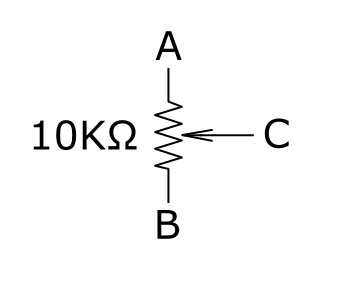
The potentiometer that is provided in the kit is a 10K Ohm potentiometer, which means that when the knob is turned fully to one end it is 0 Ohm, while at the other end it is 10K Ohm.
Using the Potentiometer
Let us fire up TinkerCAD, create a new circuit and configure your circuit like this:
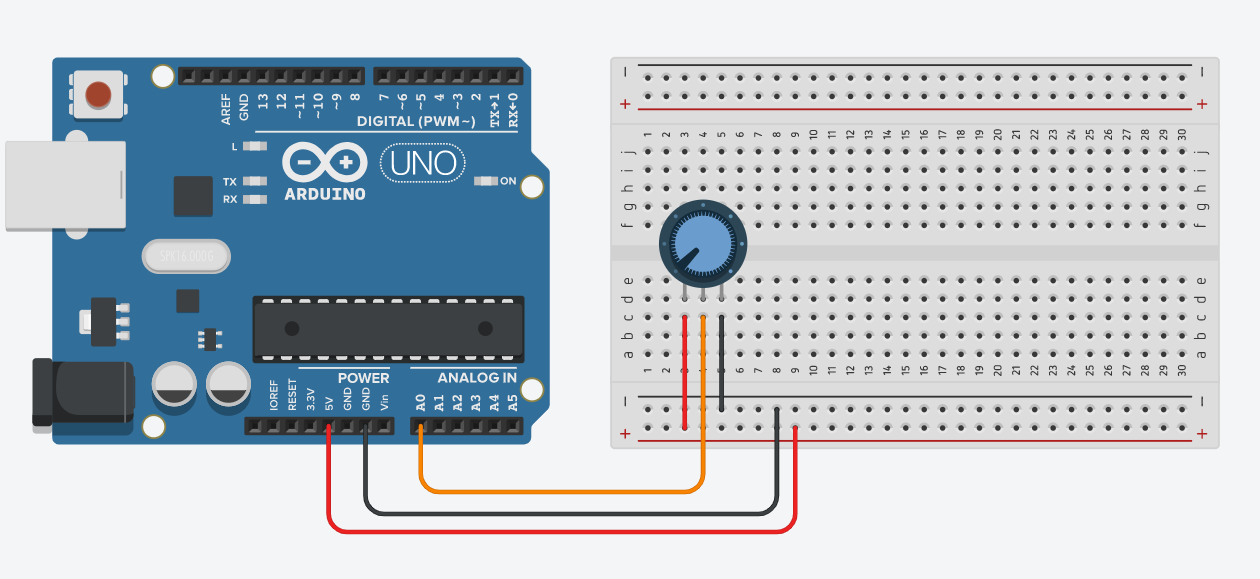
The potentiometer inside TinkerCAD might look different from the one provided in the kit. Fret not as they are the same, but do ensure that the potentiometer inside TinkerCAD is 10k Ohm. 🙂
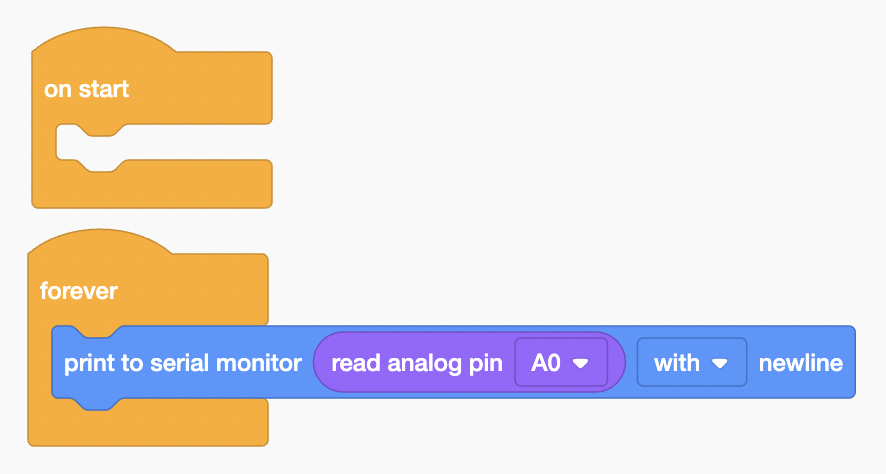
Let us program the board to output the potentiometer reading in our serial monitor!
Once you are done with the circuit and code, let's run the simulation and open the serial monitor!
As you interact with the knob on the potentiometer, you should see the number change from 0 to 1023. Why does this happen? 🤔 Onboard the SSTuino, there is an Analog to Digital Converter (ADC), and it has a resolution of 10 bits.
Let us set up this circuit on the SSTuino!
Warning: To prevent damage to your Learning Device or your components, please do not connect the SSTuino to your LD or power supply when you are wiring up your circuit.
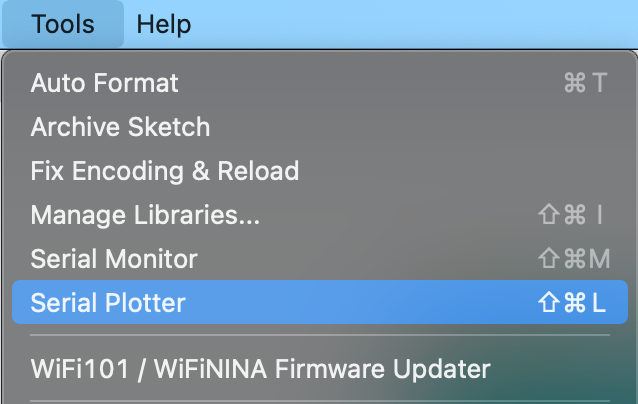
There is a cool feature inside the Arduino IDE! You can open the serial plotter as an alternative to the serial monitor as shown:
Here is what it looks like on the SSTuino II:
LED Speed Control
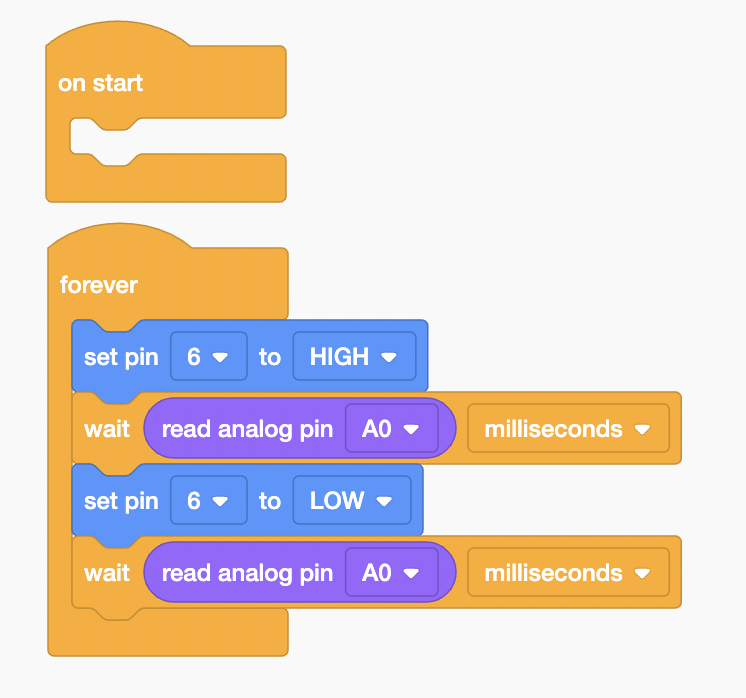
Let us make use of the potentiometer reading we have from the SSTuino to alter the blinking speed of the LED! Fire up TinkerCAD and make a circuit like so:

We are going to edit the code such that the location of the knob will affect the speed at which the LED blinks:
Here is what it looks like when I press Start Simulation:
Let us build the circuit on the SSTuino! Here is what it looks like:
Warning: To prevent damage to your Learning Device or your components, please do not connect the SSTuino to your LD or power supply when you are wiring up your circuit.
LED Brightness Control
We will use SSTuino's PWM output function to control the brightness of the LED. There are some pins with a dot • sign, which means that it can output PWM signals.
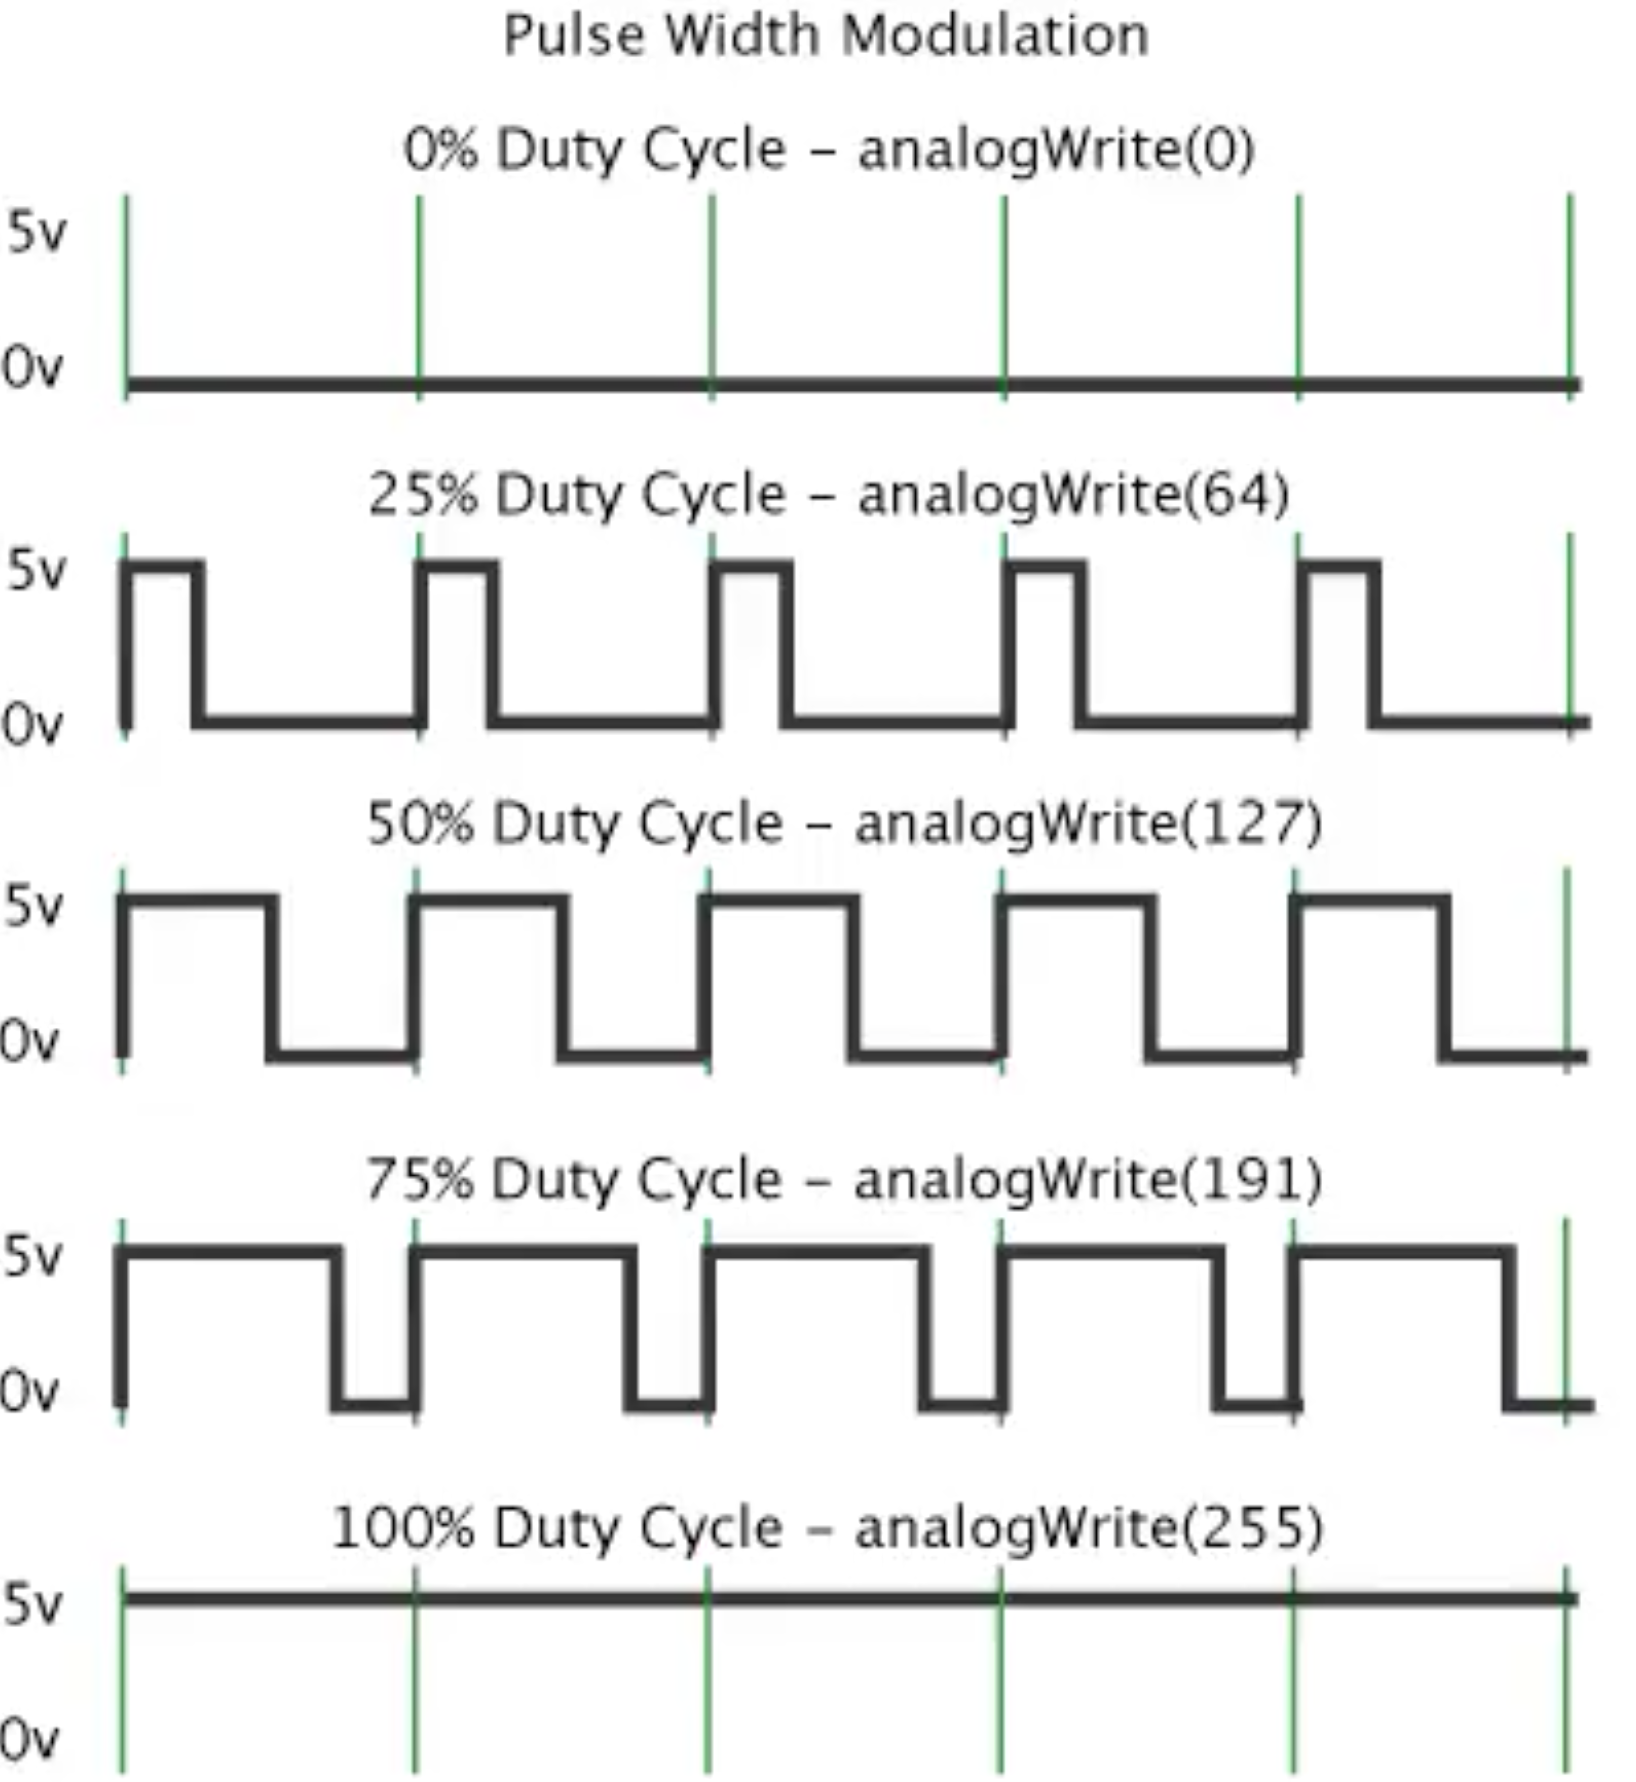
PWM stands for Pulse Width Modulation. The pin would output a series of square waves, and depending on the duty cycle, adjusts the width of the square wave. What it essentially does is that it turns on and off the component very quickly, such that our eyes cannot see the difference.
In the diagram below, you can see how the duty cycle is adjusted by changing the width of the square wave. When the duty cycle is 0, it turns off the component. From 0 to 100, it gradually increases the intensity and is a full power when at 100% duty cycle.
For this exercise, we will use the same circuit and just edit the code:
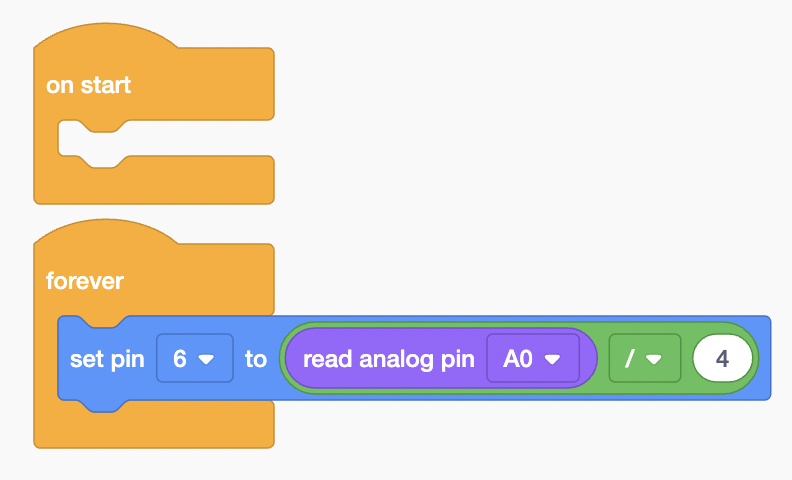
The input is divided by 4 as the range of the PWM output is only from 0-255, while the Analog input is from 0 to 1024
This is the result I should get:
Copy this circuit over to your SSTuino board setup.
Warning: To prevent damage to your Learning Device or your components, please do not connect the SSTuino to your LD or power supply when you are wiring up your circuit.
Here is what it looks like on the SSTuino II:
Bar Graph
Let us control many LEDs using the Potentiometer! The aim is to vary the number of LEDs lit up when the knob of the potentiometer is turned.
Setup the circuit in TinkerCAD as shown below:
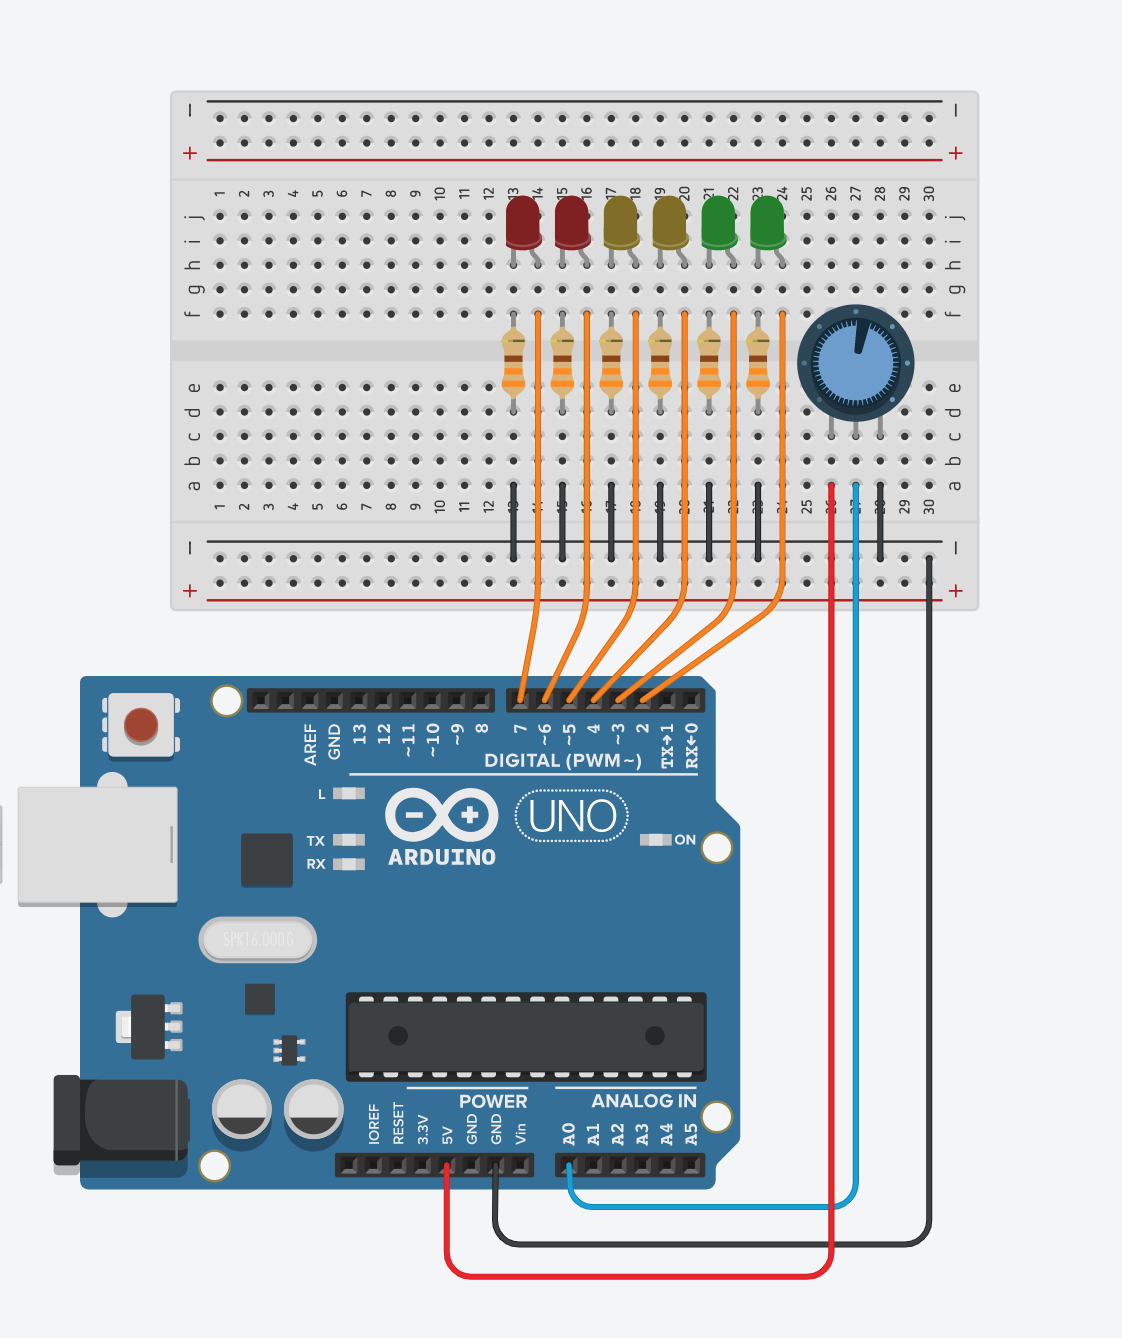
In the code, we will be using the map function to map the range of the potentiometer input (0 - 1023) to the output pins (2 - 7). The higher the readout from the potentiometer, the more LEDs are light up.
Below is an embed of the TinkerCAD example. Press on code to see the block code. Do you have alternative ways?
If you are unable to load this embed, head to this link
In text programming, you can simplify this too! How can it be done?
This is how it works on the SSTuino II: