Passive Infra-Red Sensor
Passive Infra-Red (PIR) sensors are found in a lot of buildings and infrastructures to detect the presence of people. For example, the toilets in SST are equipped with PIR sensors to automatically turn on and off the lights to save electricity.
Table of Contents
About the sensor
There are two main components of the PIR sensor. The first one is the electronics, which detects the movement of objects crossing the sensor. The second one is the lens, which is the magic sauce to help the sensor increase its detection area.
Let's Build it!
Head over to TinkerCAD and create a new circuit like the one below:
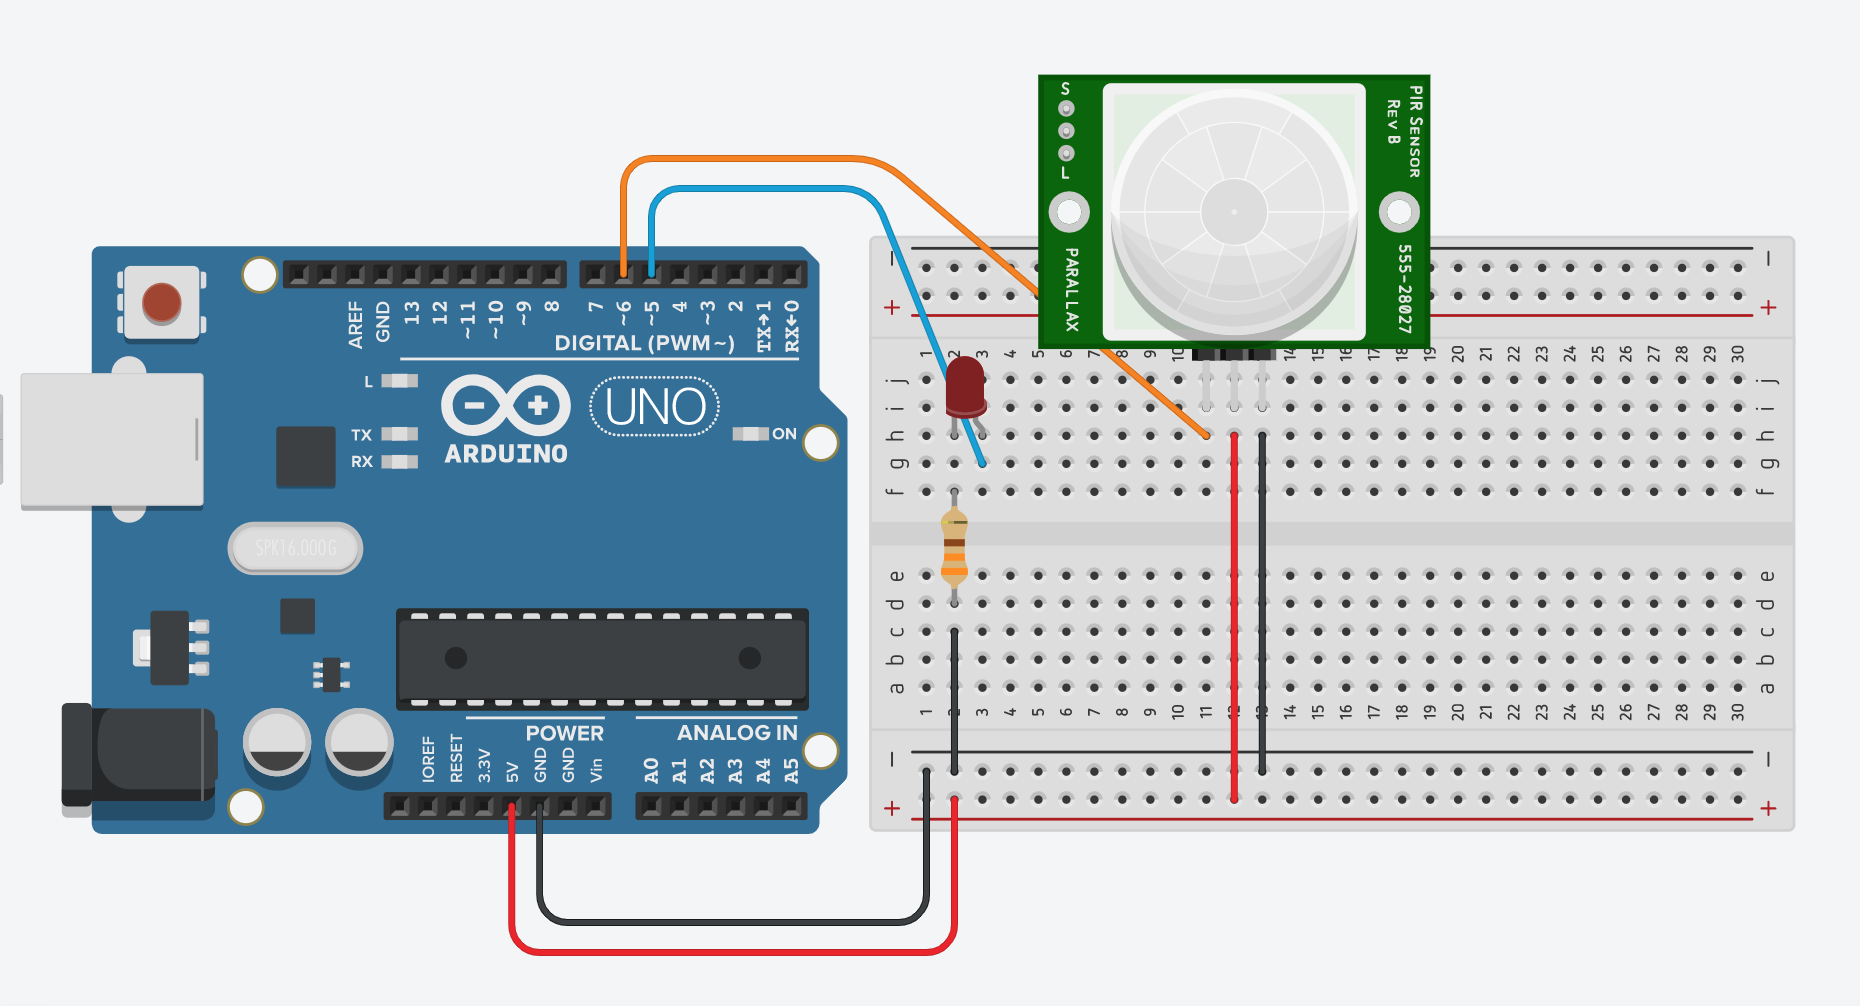
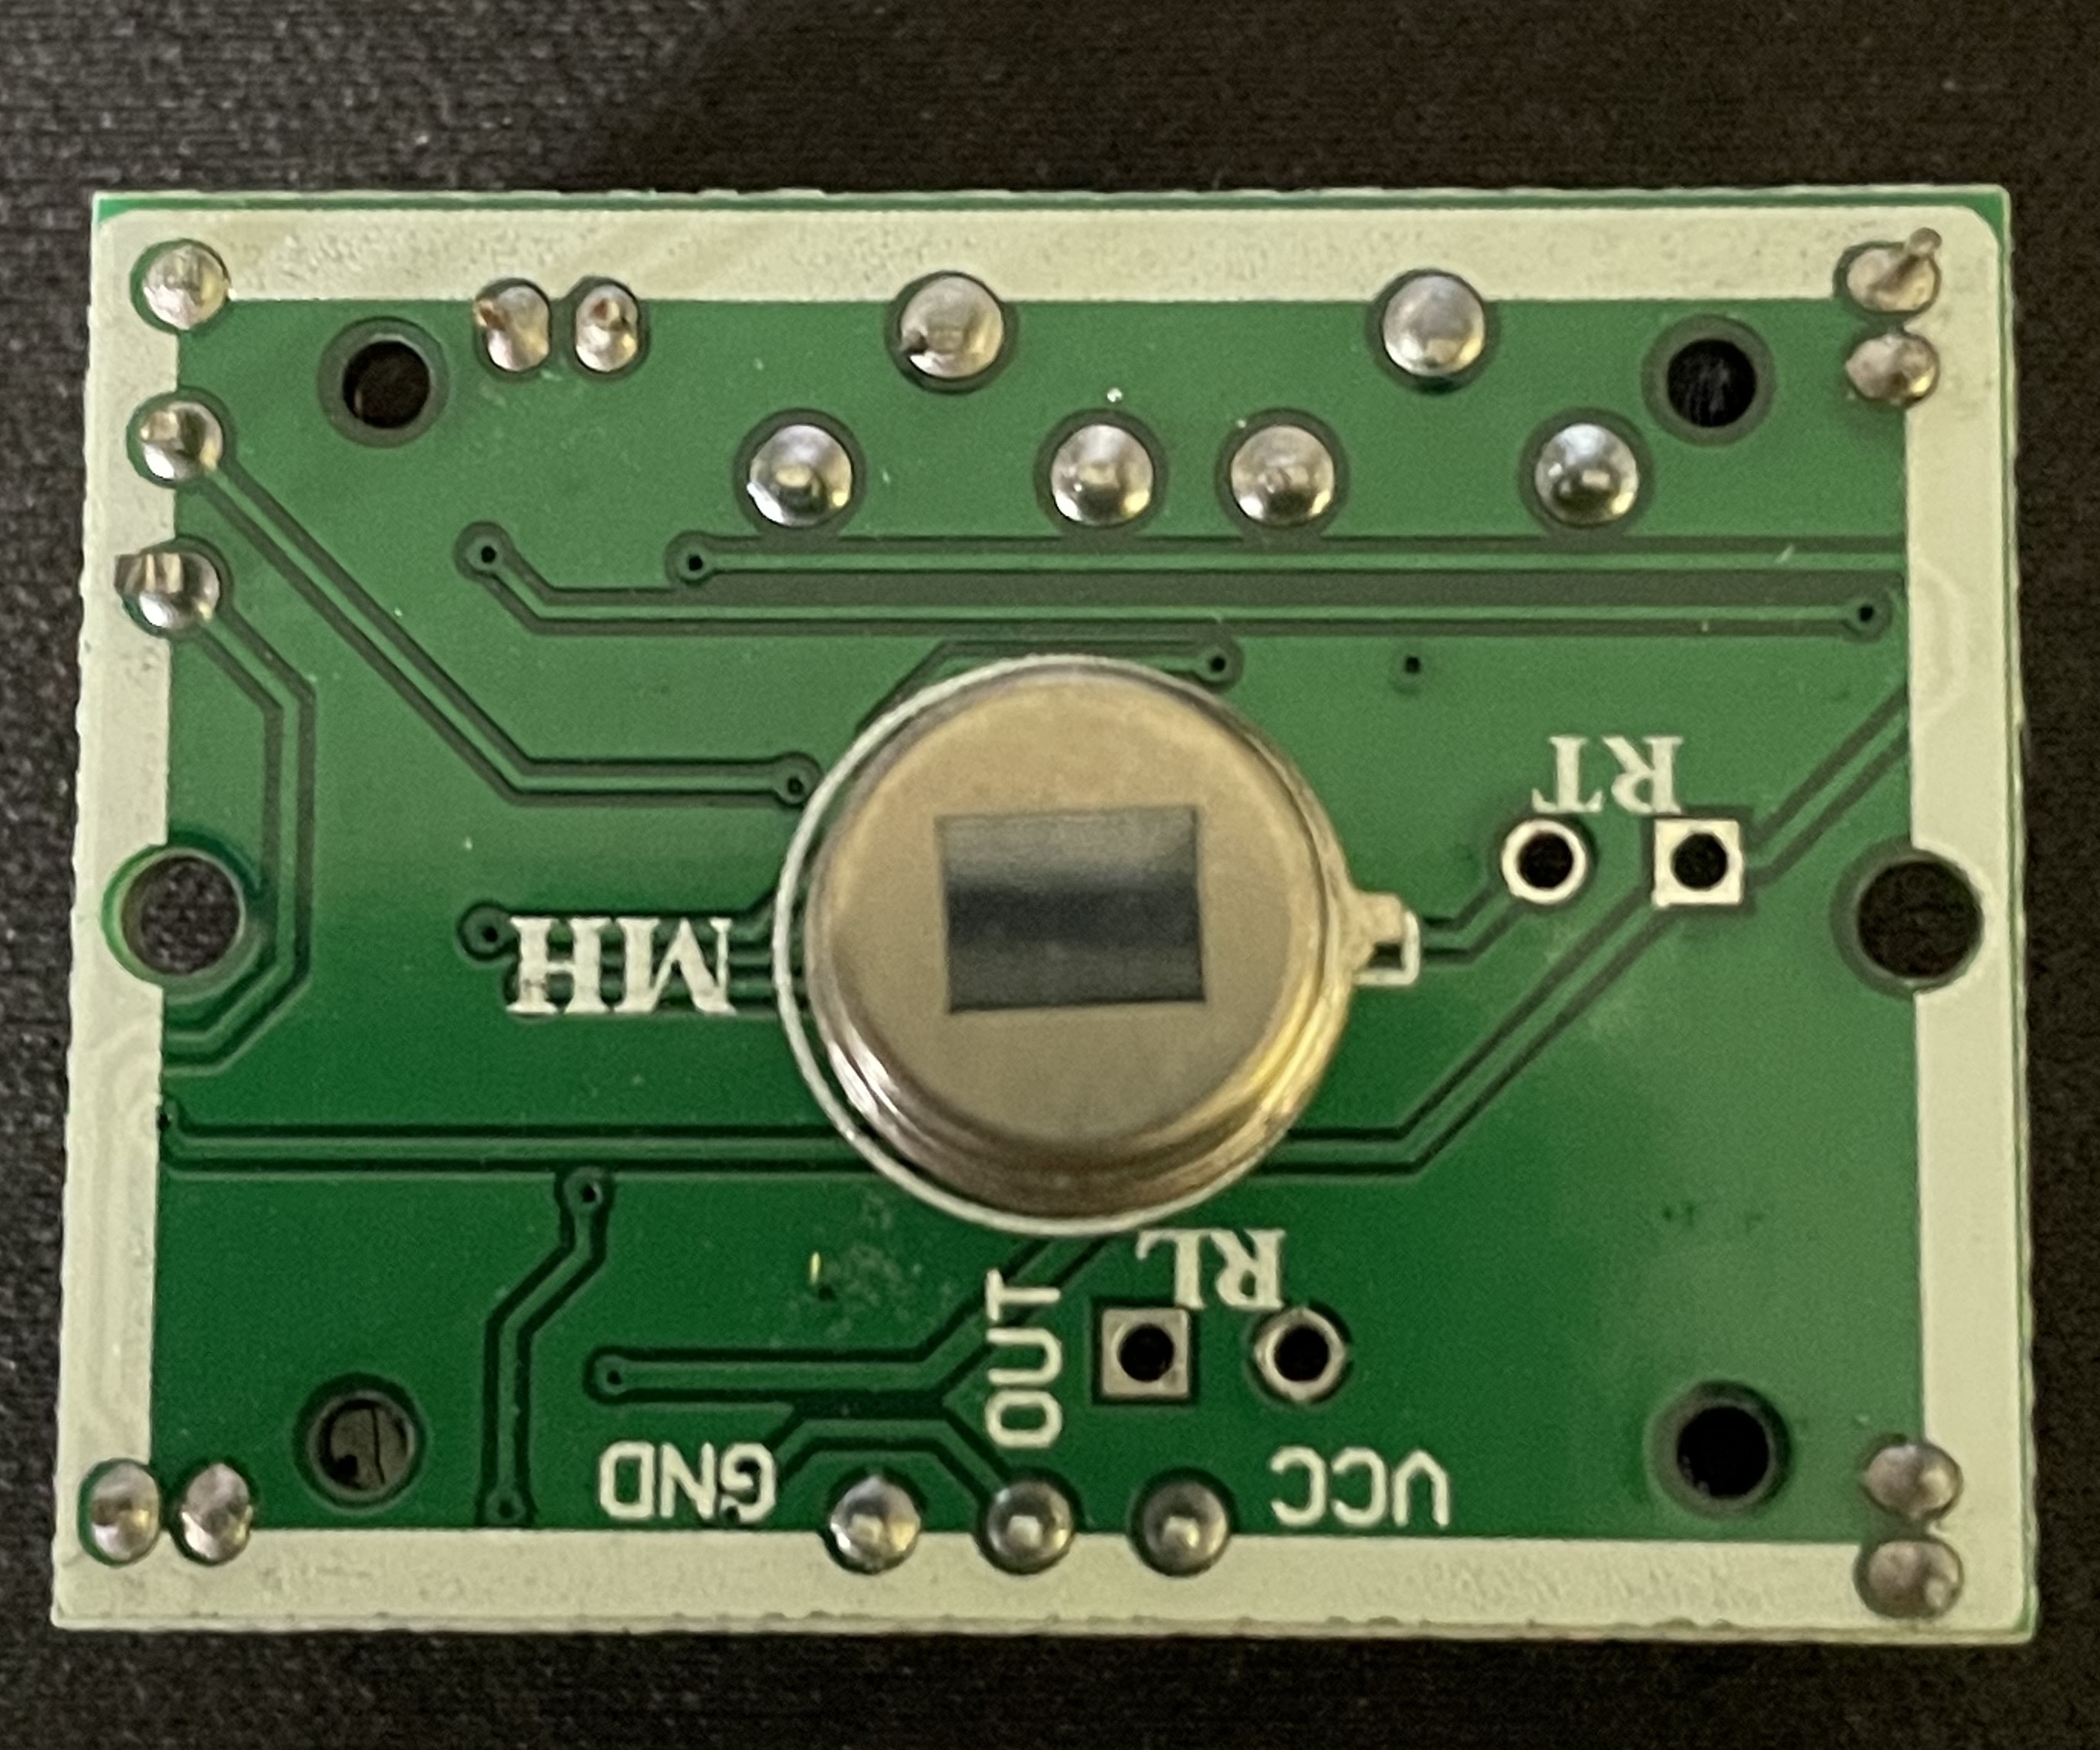
Warning: The pinout for the PIR sensor that is provided with TinkerCAD is different from the kit! We will be talking about the sensor provided in the kit in the sections below.
Here are the pinout differences between the two sensors:

Fresnel Lens
The lens for the PIR sensor helps it to detect objects from a distance! However, this will not work for a classroom environment because there will be too many people attempting this and as a result, the sensor will always detect movement! 🤣
To prevent this, let us remove the lens to reduce the detection range!
Let's build the circuit on the SSTuino and we will be moving into programming this example with the Arduino IDE!
Moving into Arduino IDE
Let's start programming on the Arduino IDE! Open up the Arduino app. A new window should appear.
Let's make use of this template we learned previously:
Declaration
Our code only requires us to light up the LED and send the data to the serial monitor, so I don't think there are any variables to declare. Alternatively, you can do so if you wish to for the numbering of the pins.
Setup
This section will set up the input pins, output pins and indicate that we want to use the serial monitor.
void setup()
{
    pinMode(6, INPUT); // This pin will receive the input signal from the PIR Sensor
    pinMode(5, OUTPUT); // This pin will turn on and off the LED
    Serial.begin(9600); // This will initialise the serial monitor
}
Loop
This section will run the code forever when the SSTuino is powered on.
void loop()
{
    if (digitalRead(6) == 1)
    {
        digitalWrite(5, HIGH); // This if statement states that if the PIR sensor detects movement, the LED will light up and serial monitor will print a new line "Detected!"
        Serial.println("Detected!");
    }
    else
    {
        digitalWrite(5, LOW); // Else the LED will turn off and print a new line "Not Detected!"
        Serial.println("Not Detected!");
    }
}
Your Turn
Let's try this out! This is what it looks like on the SSTuino:
Let's make some changes: Could you make the LED flash on and off every second once the PIR sensor detects movement?
Let's share your work! Record and post a video onto Instagram with the hashtag #sstuino!