Piezo
Let us play some tunes with the SSTuino! We are now going to insert a piezo element into our circuit.
About the Piezo
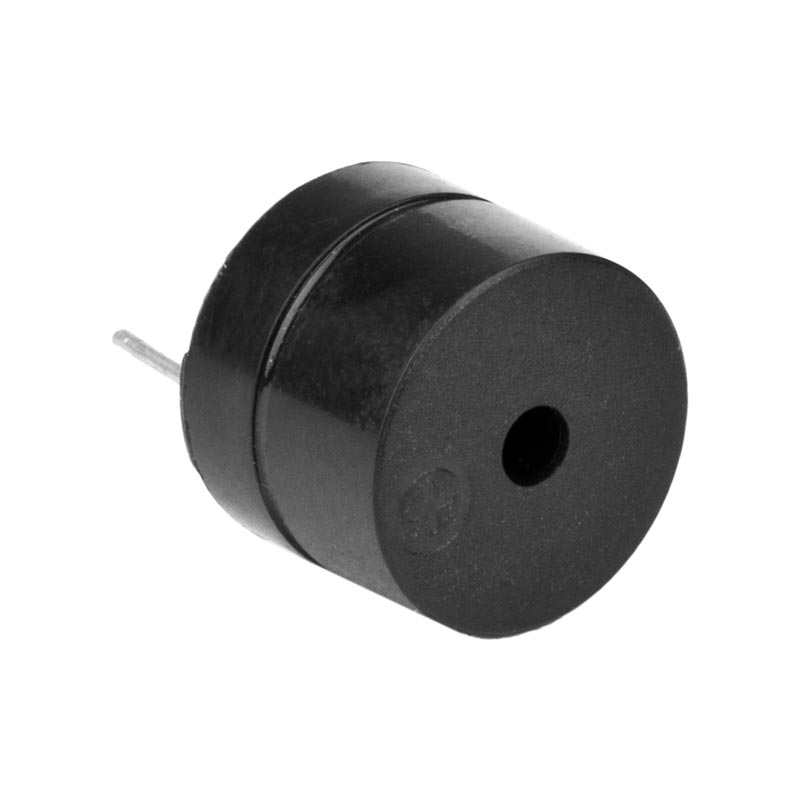
The Piezo Buzzer provided in the kit uses the piezoelectric effect to produce sound. They are easy to drive (i.e. do not need much energy to generate sound) and are also cheap to produce.
Generally, Piezo Buzzers are sold in two types:
- A fixed frequency with resonator (will have a fixed pitch when turned on)
- A variable frequency without a resonator (pitch can be controlled externally)
The buzzer provided in the kit does not come with a resonator so we can change its pitch using the SSTuino.
TinkerCAD Exercise
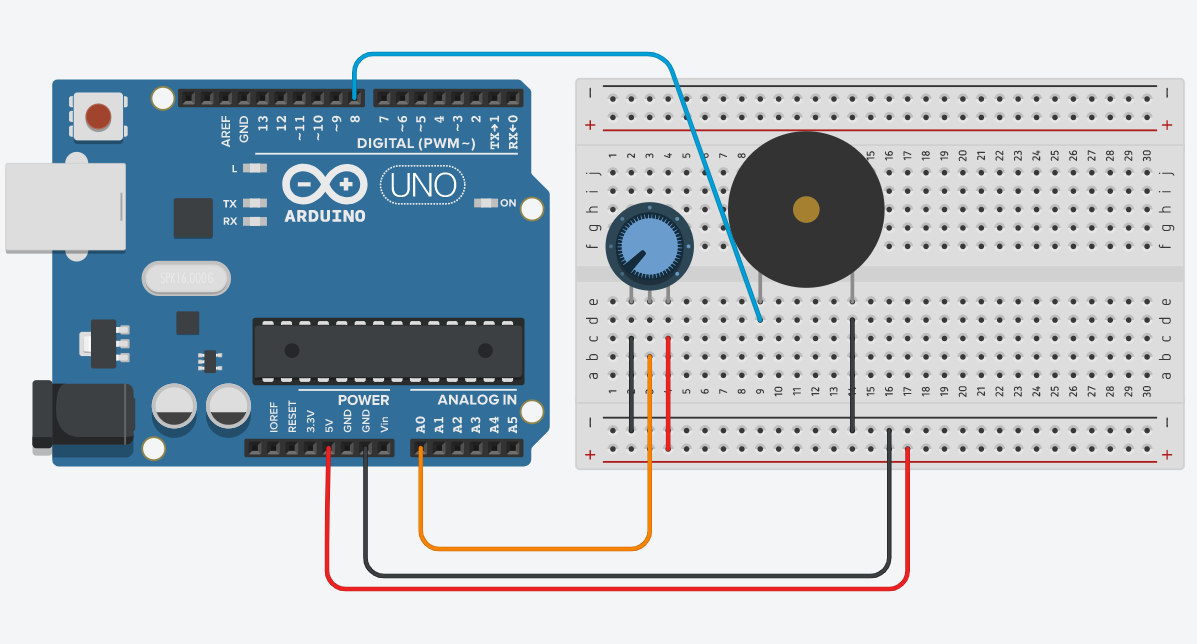
Let's set up the buzzer inside TinkerCAD! Configure your circuit like this:
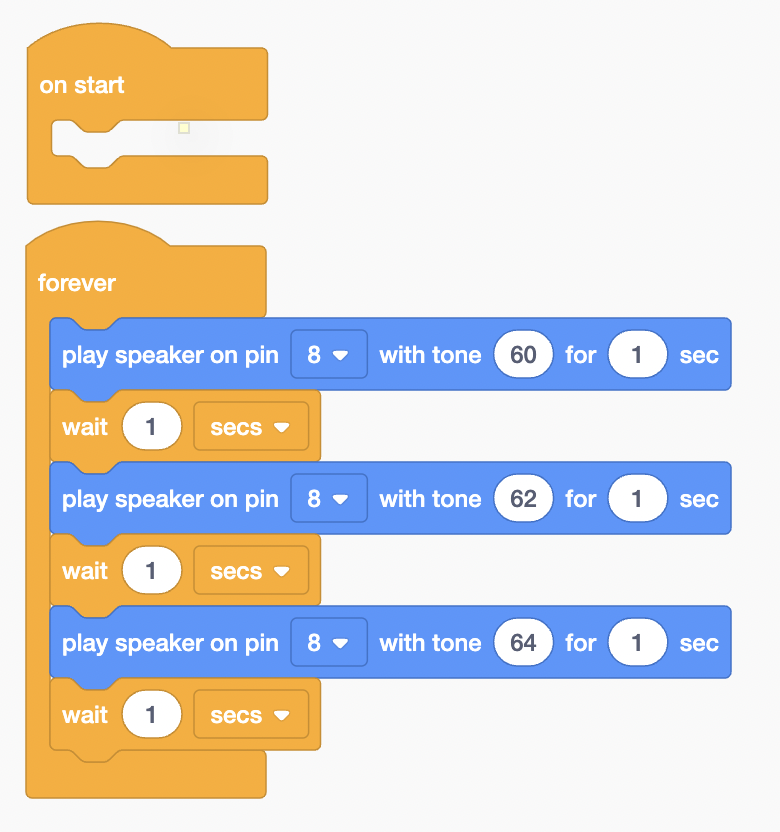
I am going to play 3 tones on the harmonic scale. Below is how I programmed it. Can you program it to play up to 1 full scale? (Do, Re, Mi, Fa, So, La, Ti Do!)
Let's create this circuit on the SSTuino! This is what it looks like:
Warning: To prevent damage to your Learning Device or your components, please do not connect the SSTuino to your LD or power supply when you are wiring up your circuit.
Tip: This video contains audio. Please enable audio to hear the sounds from the Piezo.
Pieno
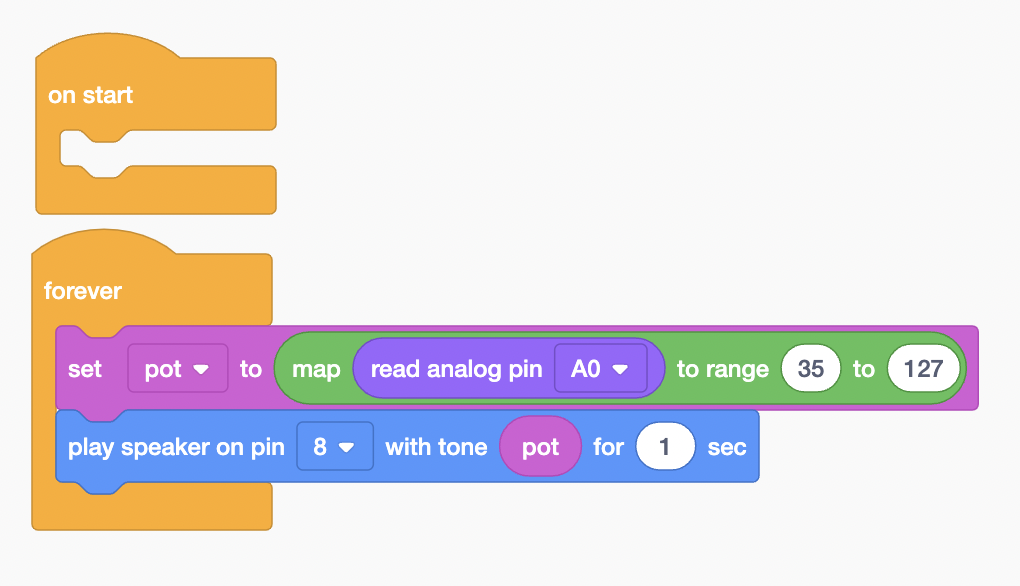
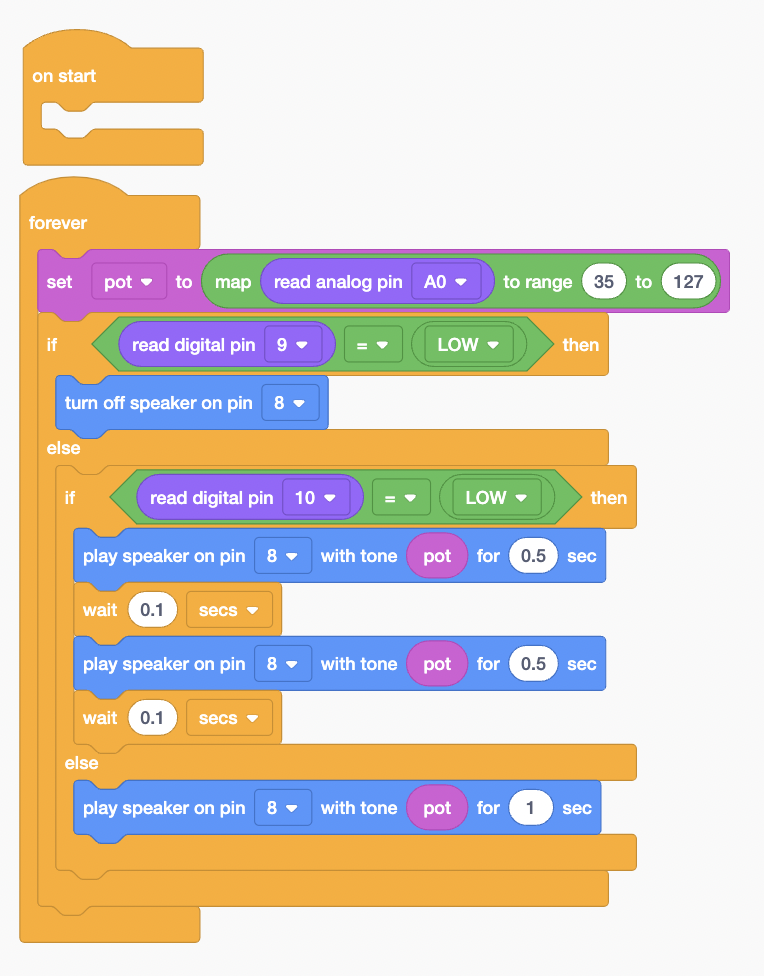
We are now going to use the potentiometer to control the tone of the speaker. When you turn the knob on the potentiometer, the pitch of the speaker will change. With the same circuit as the previous exercise, we are going to tweak the code for the Pieno.
First, we will need to create a new variable called pot. In this exercise, we are going to use the map to range function. The potentiometer has a range from 0 to 1023, but the speaker has an output range of 35 to 127. By mapping the range, we can make sure that when the potentiometer is at one end of the input range, the speaker is also at one end of its output range.
After you have tried this out, run the simulation and create your own music!
Let's try this on the SSTuino!
Warning: To prevent damage to your Learning Device or your components, please do not connect the SSTuino to your LD or power supply when you are wiring up your circuit.
Tip: This video contains audio. Please enable audio to hear the sounds from the Piezo.
Enhance the pieno
Would it be possible to add more functions to the pieno? Sure thing! Let us add 2 more buttons to the circuit as shown:
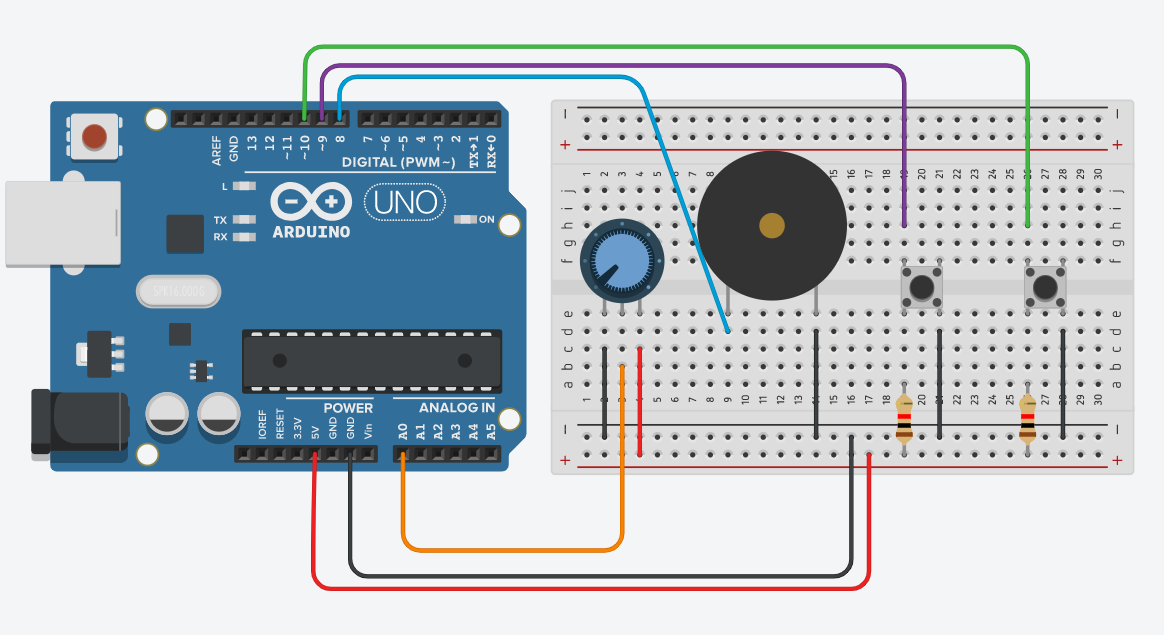
We will add two functions:
- A button to stop the music (mute button)
- A button to make the piezo beep intermittently
Let's create this circuit on the SSTuino? Did you manage to do it?
Warning: To prevent damage to your Learning Device or your components, please do not connect the SSTuino to your LD or power supply when you are wiring up your circuit.
Let's share your work! Record and post a video onto Instagram with the hashtag #sstuino!