Building a circuit on SSTuino
So you have built yourself some very simple circuits. Now let us build circuits, but with the SSTuino!
Table of Contents
In TinkerCAD, create a new circuit. In this new circuit, drag out an Arduino Uno, a breadboard, one resistor and a LED. Connect it in this manner, with the Positive(+) connect to 5V and the Negative(-) connect to GND.
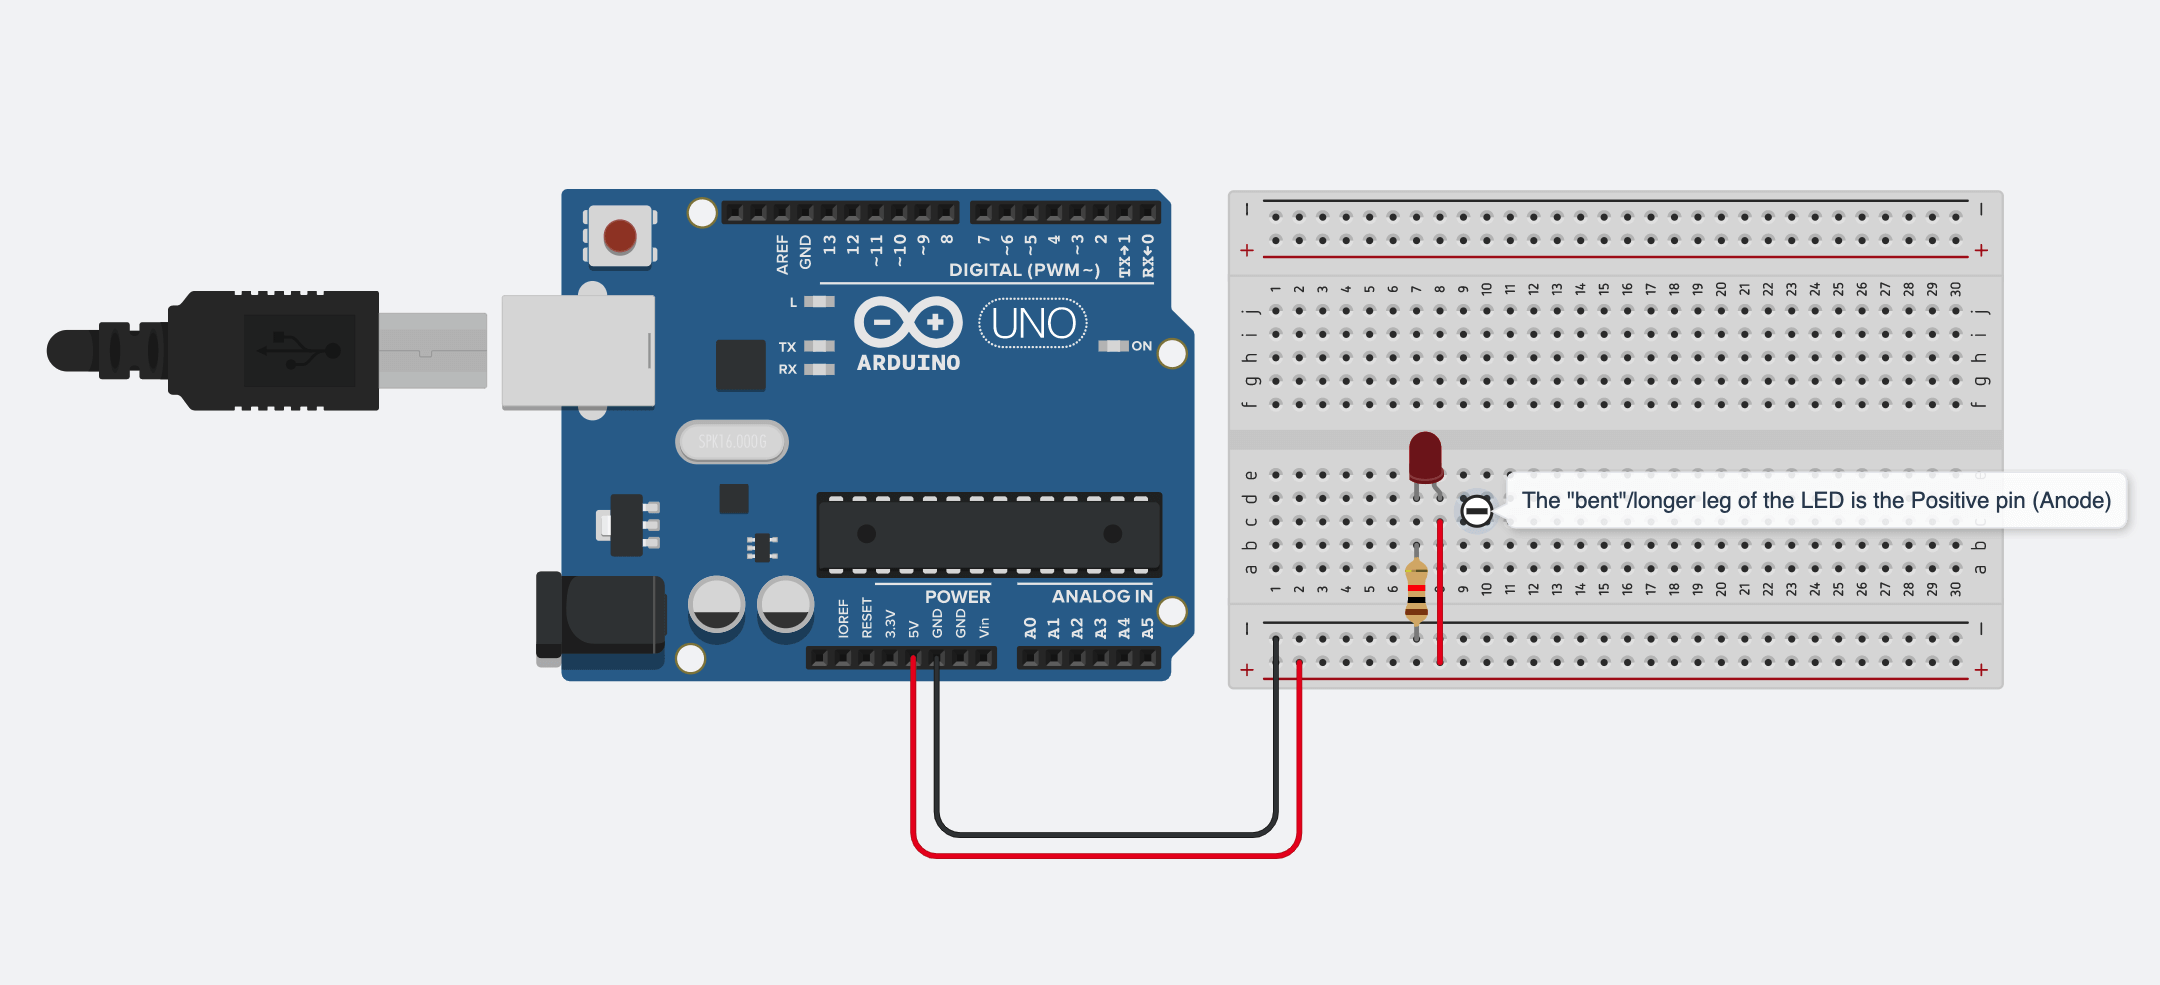
Press Start Simulation and see your circuit light up!
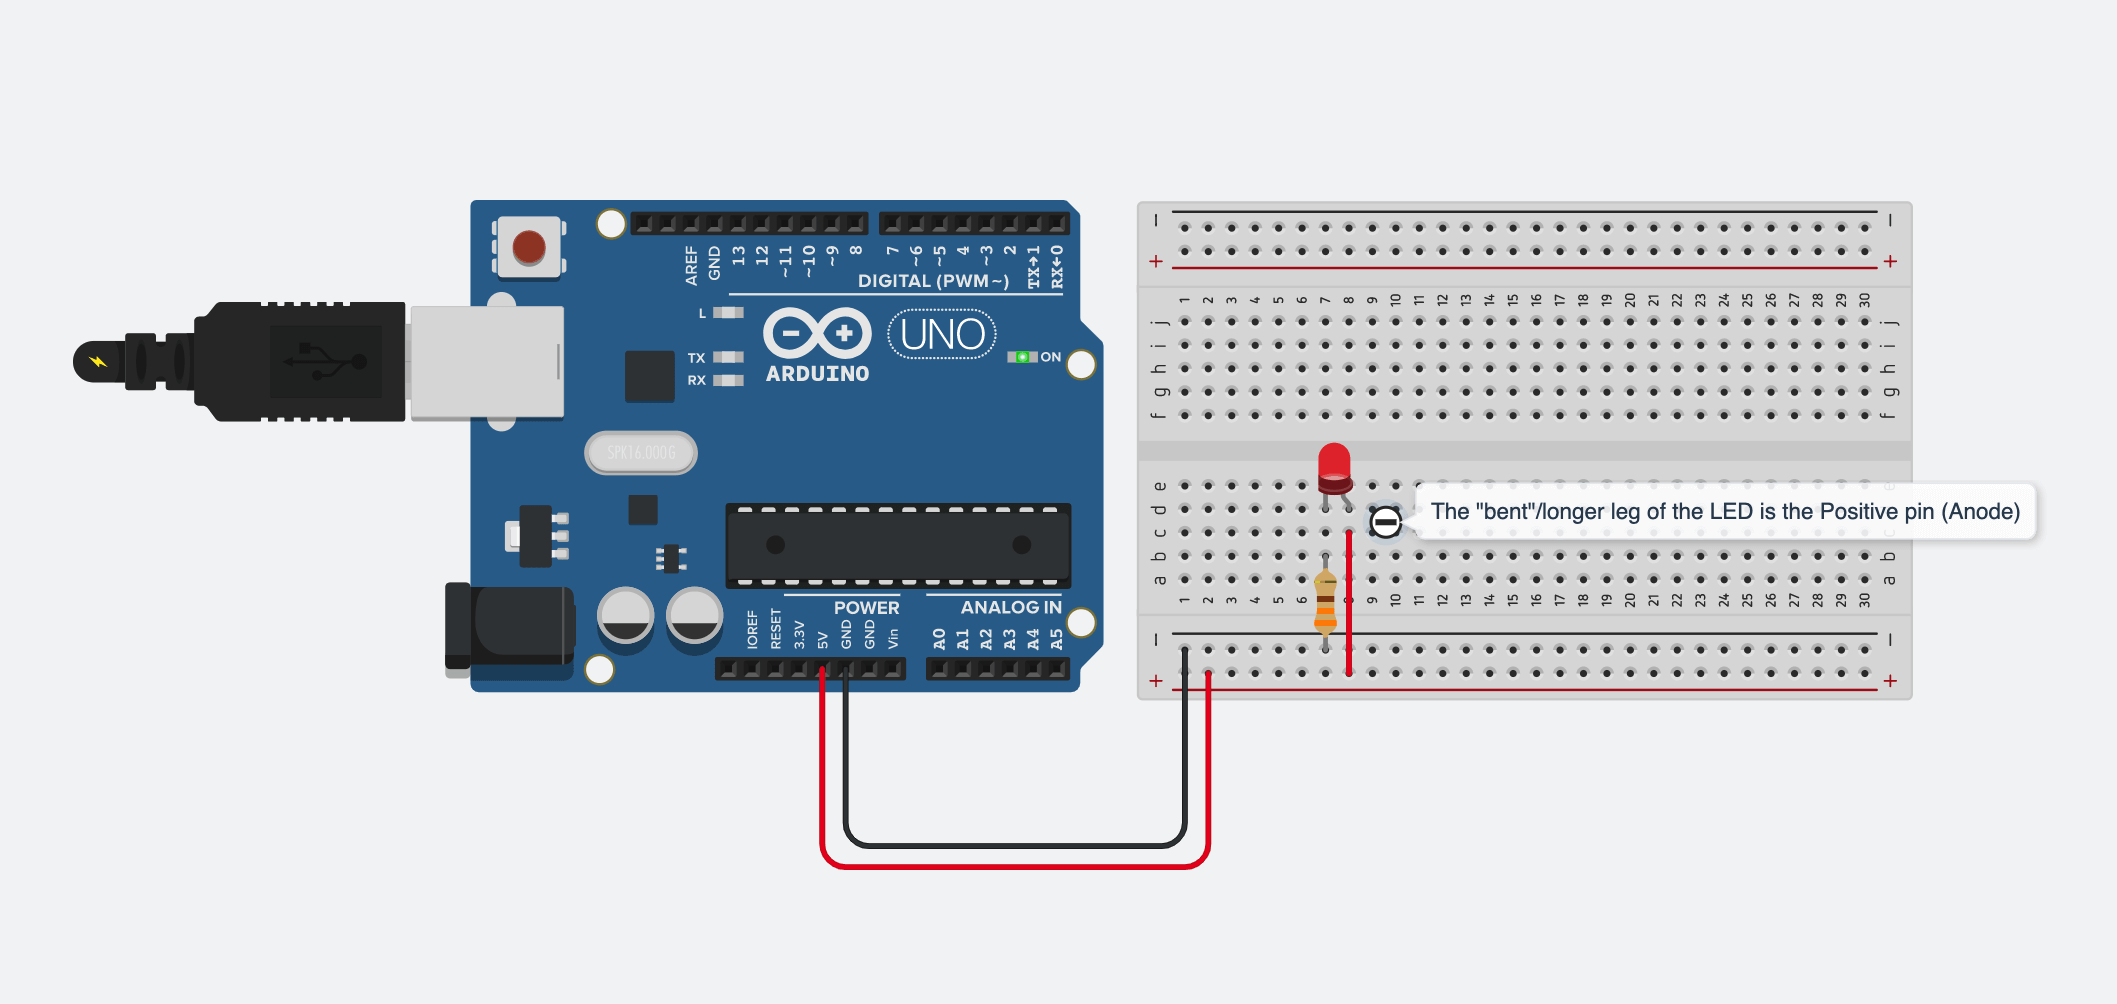
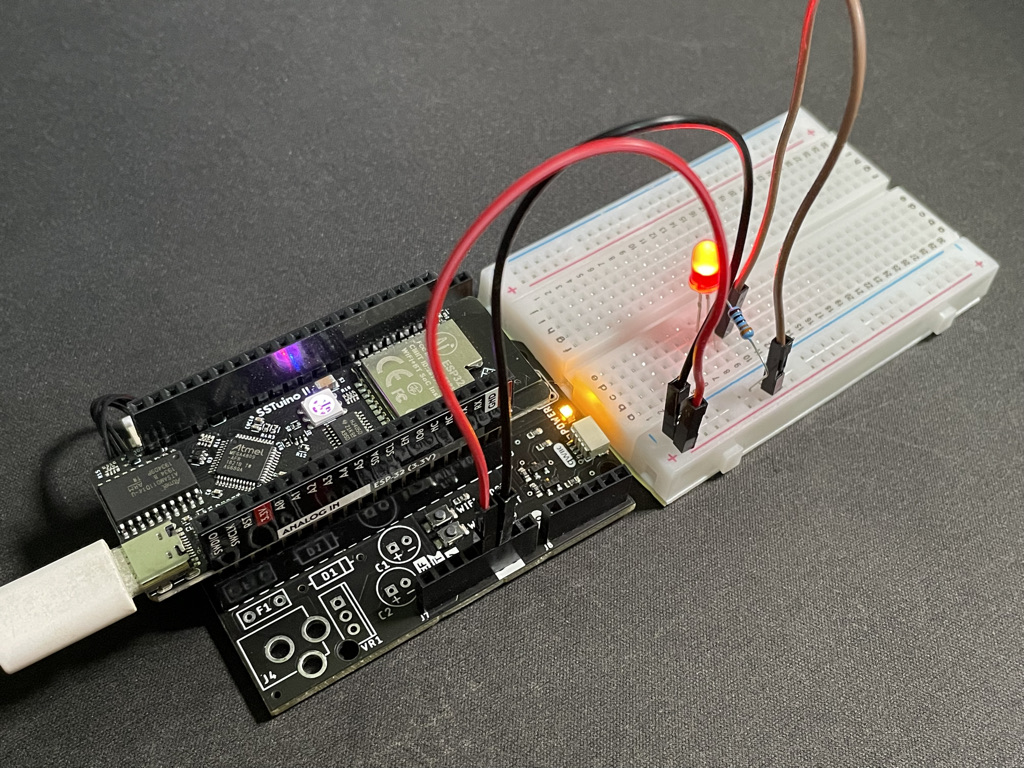
Now, copy your circuit from TinkerCAD onto your SSTuino.
Warning: To prevent damage to your Learning Device or your components, please do not connect the SSTuino to your LD or power supply when you are wiring up your circuit.
It should look something like this:
Let us go back to the simulation and change the circuit like this:
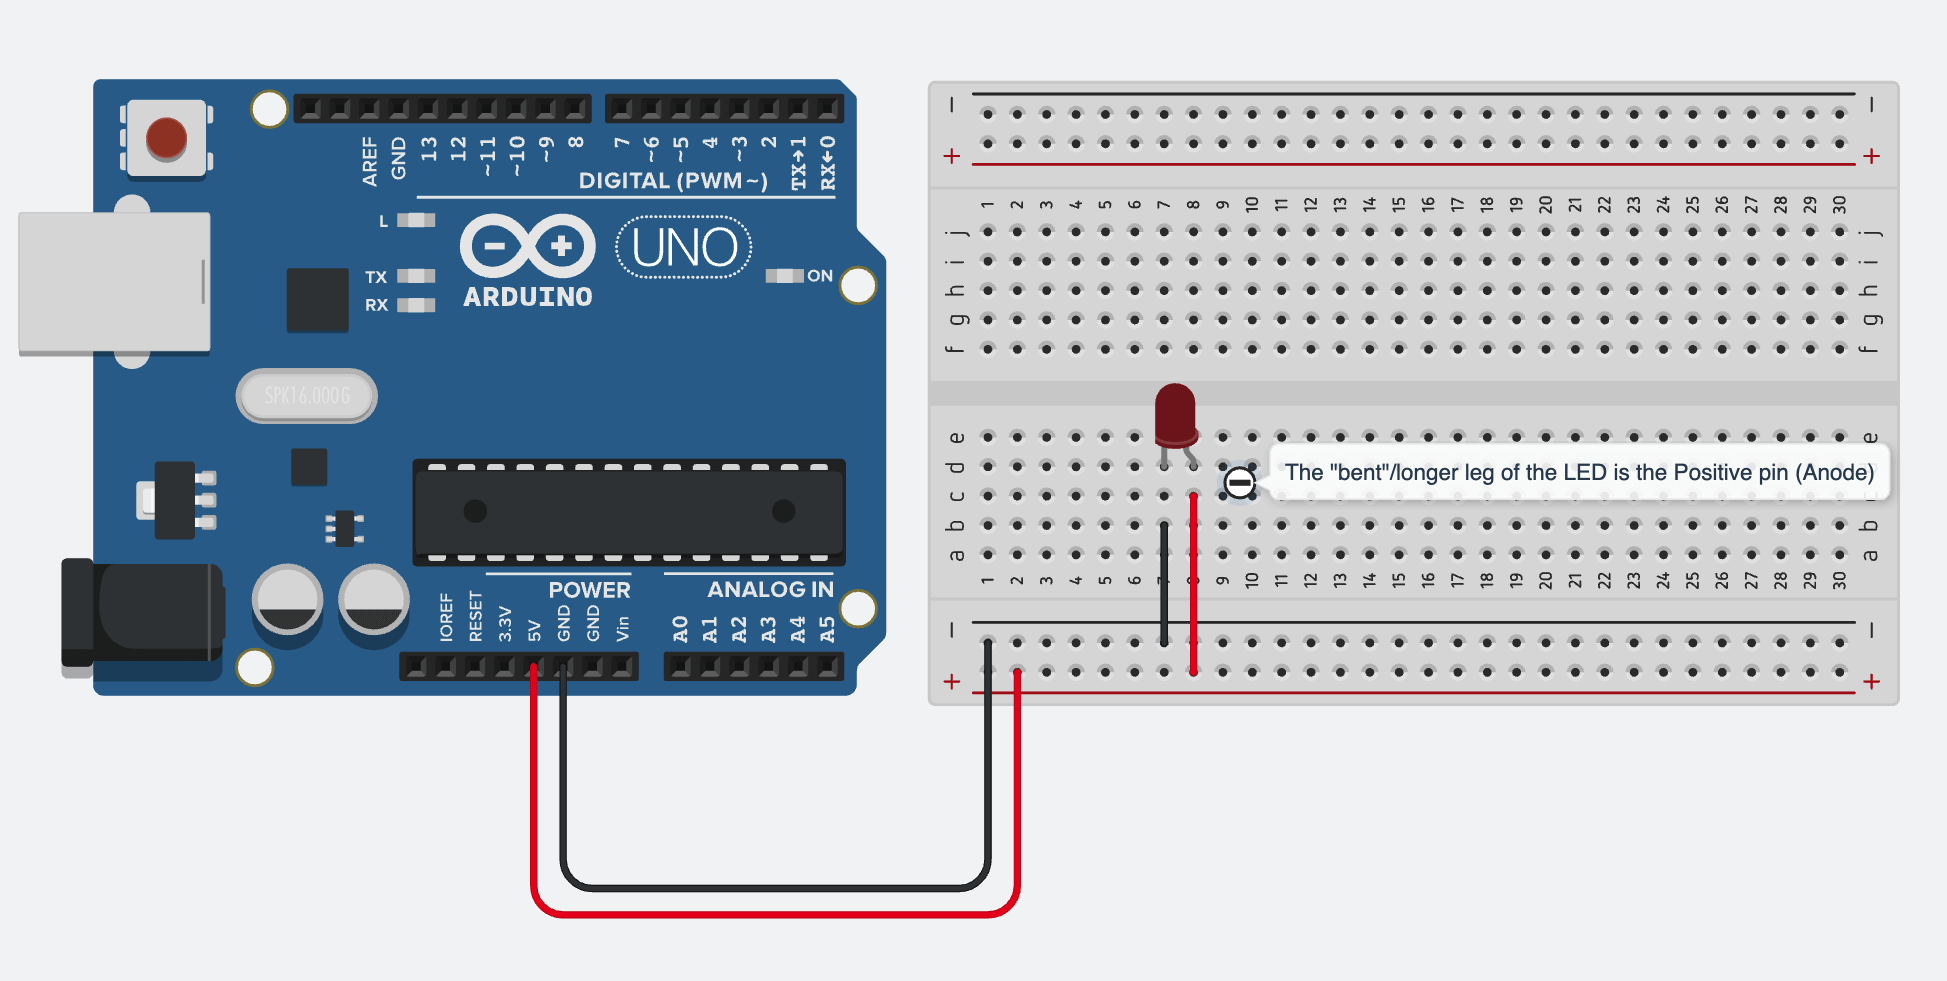
What would happen and why?
Tip: Remember, it is important to add a resistor in your circuit to prevent too much current flowing through your components.
Adding a button
Let us add a button to control the circuit! Set up your circuit like this:
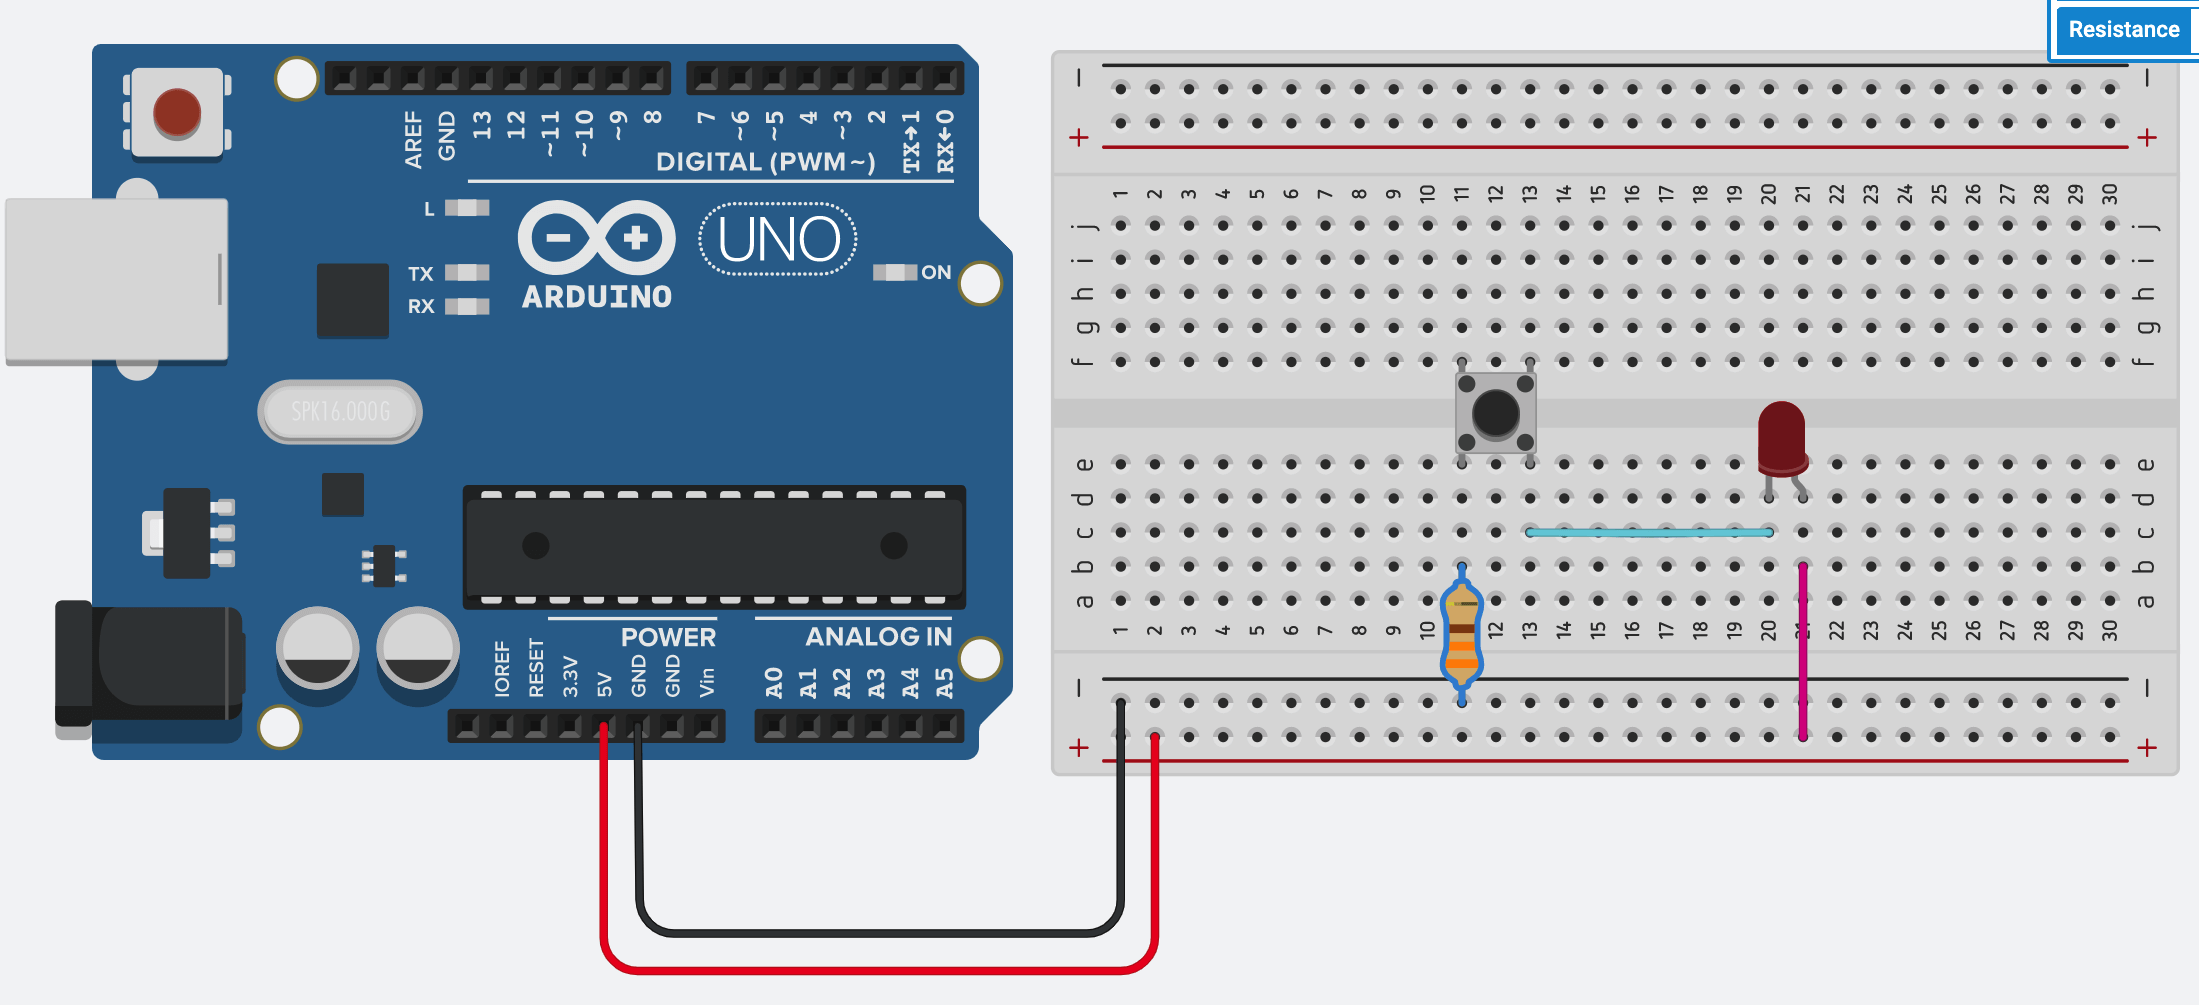
What this circuit allows you to do is to turn on and off your LED. This push button works something like this: When you press the button, the circuit is closed and current can flow to the LED, which makes the LED light up. When the button is not pressed, the circuit is considered open and current will not flow to the LED, which makes the LED not light up.
Copy this circuit over to your SSTuino board setup. This is how it looks:
Warning: To prevent damage to your Learning Device or your components, please do not connect the SSTuino to your LD or power supply when you are wiring up your circuit.
You can consider adding more LEDs to the circuit. How would you add the LEDs to the circuit? What kind of reaction does your circuit have?
Light Dependent Resistor
The Light Dependent Resistor (LDR/Photoresistor) is a resistor that reacts to light. It changes resistance when the amount of light it detects changes. Create a new circuit and set up your circuit like this:
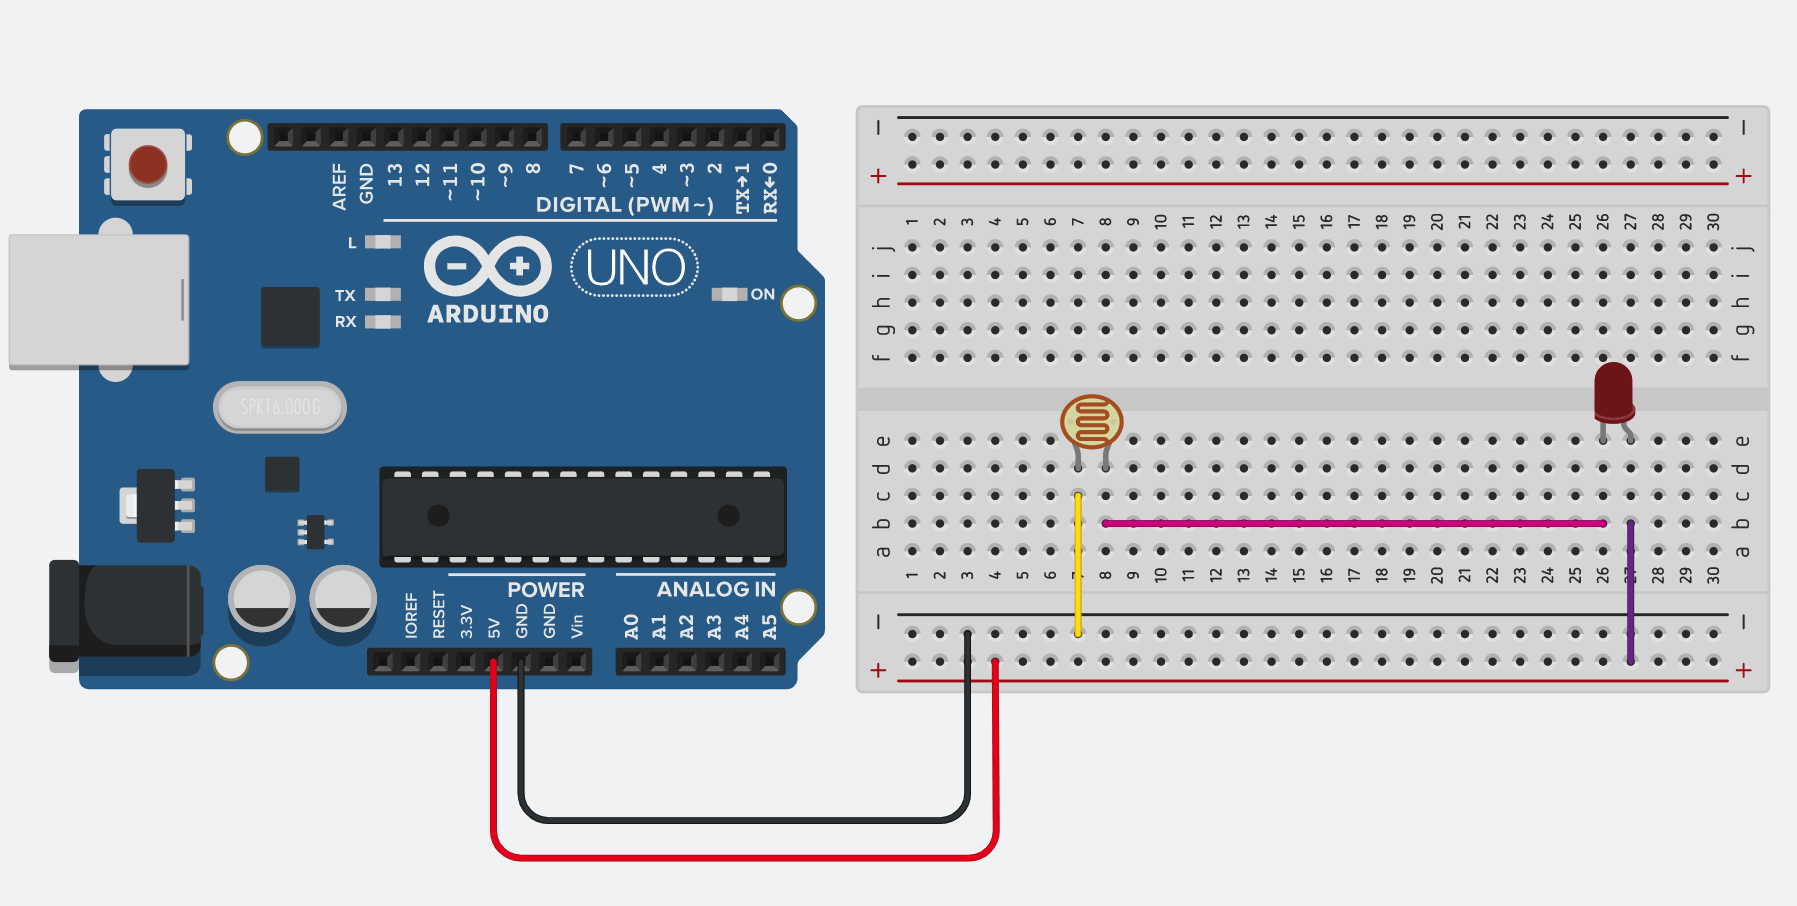
What this circuit allows you to see is the difference in LED brightness as you cover the LDR or shine a torch on it.
Copy this circuit over to your SSTuino board setup.
Warning: To prevent damage to your Learning Device or your components, please do not connect the SSTuino to your LD or power supply when you are wiring up your circuit.
What happens to the LED brightness as you play with the LDR?
Let's share your work! Record and post a video onto Instagram with the hashtag #sstuino!
